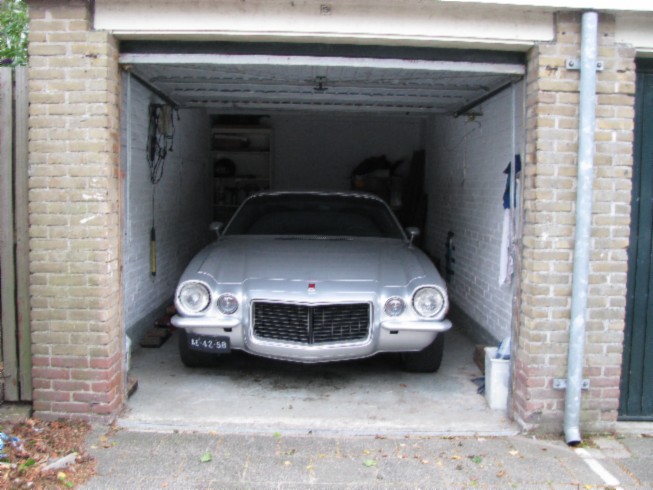
My Camaro
page 51
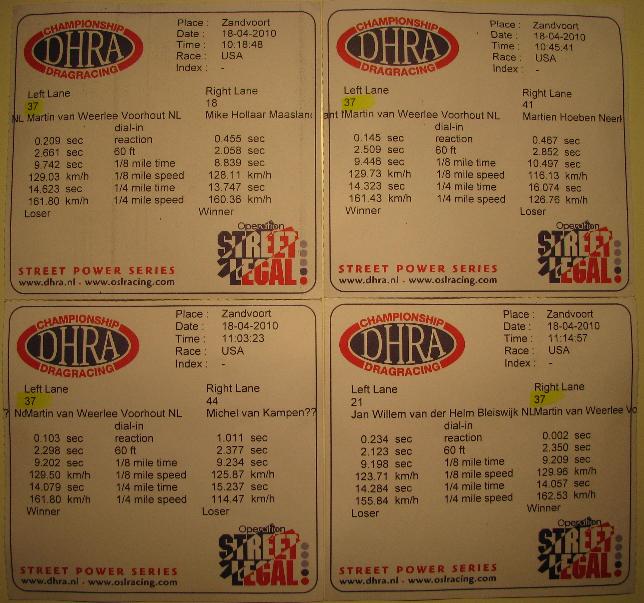
2010, not my lucky year...april through august.

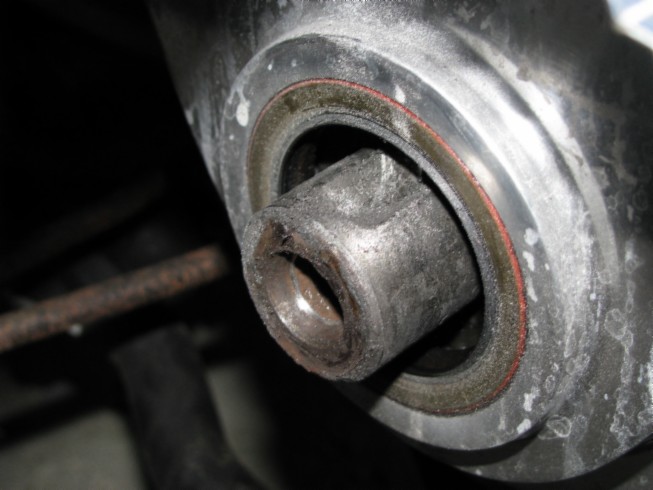
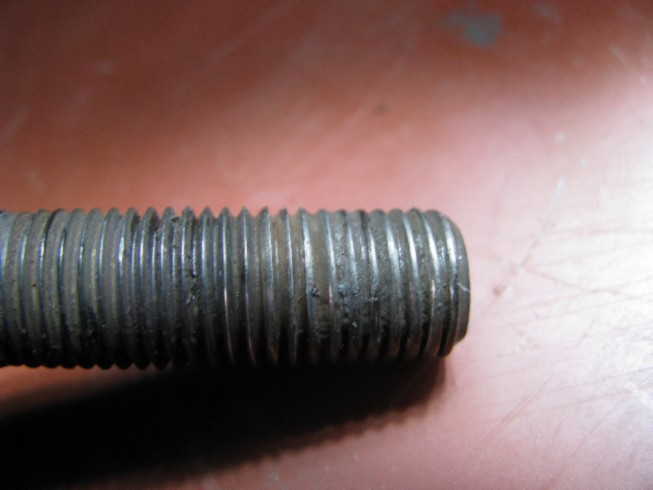
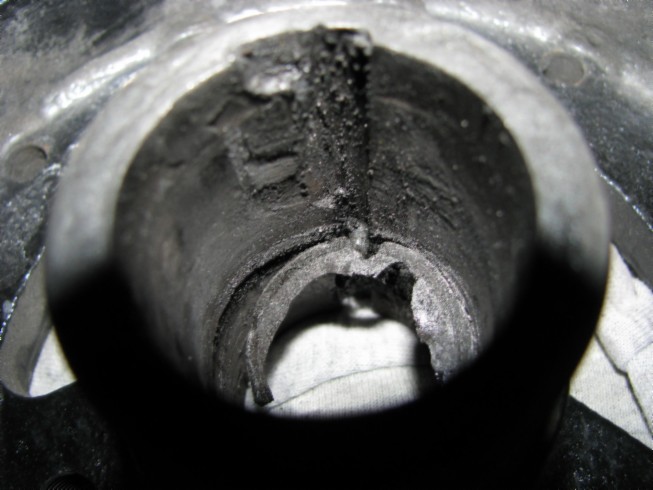
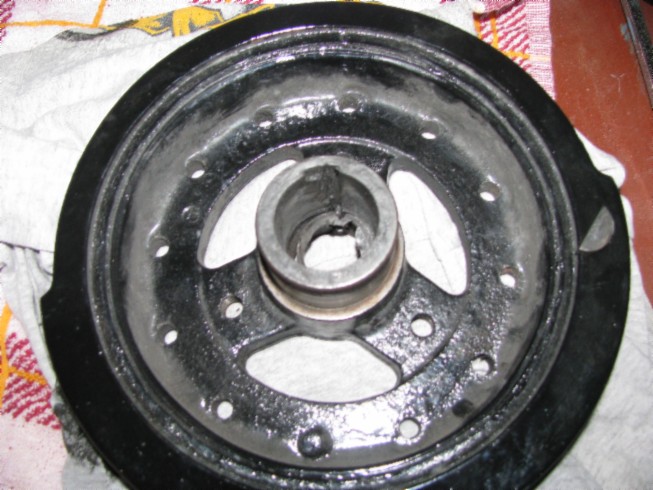
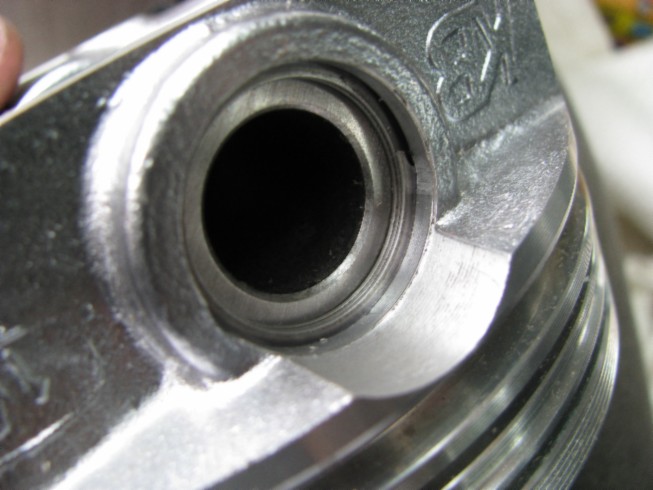
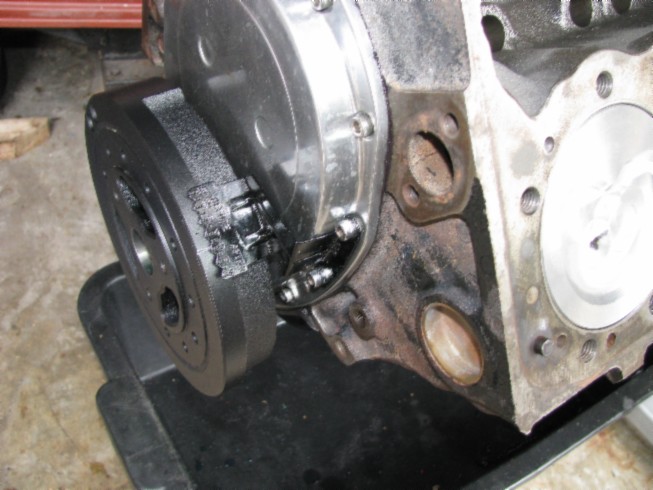
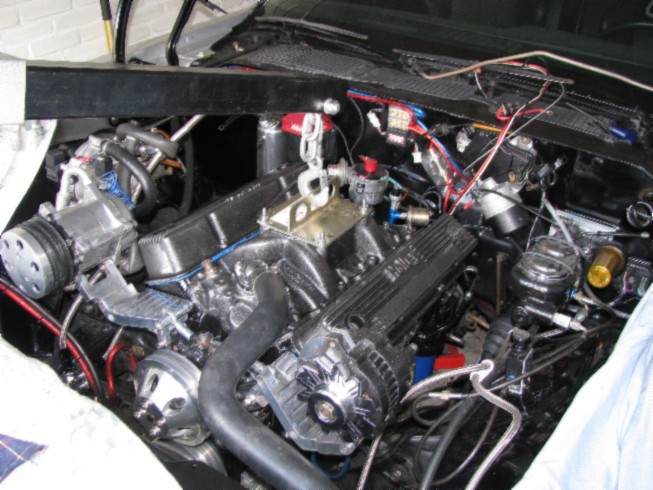
When we drove home in the evening I suddenly noticed a slight vibration.....when I got home and investigated it it turned out the balancer bolt was loose....but that was not all....the balancer was loose too. After disassembly I found that the keyway on the crank was seriously damaged, as was the balancer itself and the threads in the crank snout were stripped. So this was a bad set-back.....I had to get a new 400crank and found one locally that was ground and came with new bearings. I took the engine out of the car and put it on a stand and found also a few teeth of the flexplate were damaged a bit. So I ordered a whole lot of new parts so I could fix it.
I think the whole deal cost me around 15 to 20 hours besides a lot of money :-(
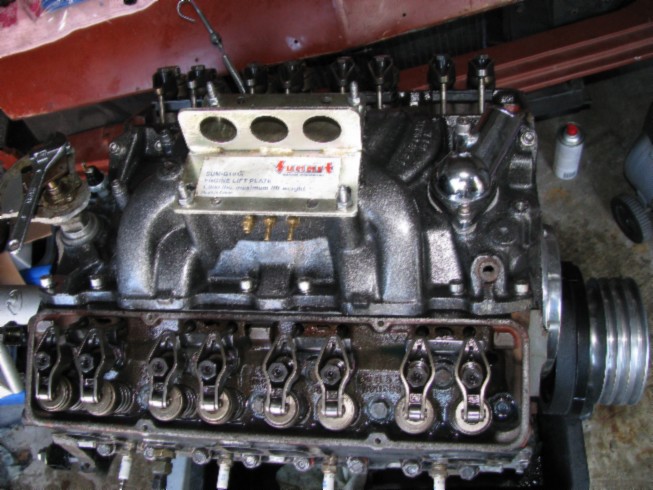
I put in new spark plugs, an oil filter and Brad Penn 10W40 performance oil, replaced the header/collector gaskets (with copper caskets)
I also bougth a small oil cooler for the power steering/hydraboost system. I did not have any problems yet but I've heard that the fluid will heat up quickly with track driving so this is just to be sure the system will not overheat. I will install it later when everything is up and running again.
The alternator only started charging from around 900-1000rpm so when running idle/slow speeds the voltage would drop. To solve this I ordered an overdrive pulley for the alternator.
Together with my friend Michel from www.underground-metalworks.com we put in the new crankshaft and later I put everything back together again.
After startup I noticed a strange noise, sounded like a bad connector rod bearing....terrible knock :-( Oil pressure is very good at idle and climbs with engine rpm which would indicate bearings are fine.
At least the alternator is charging even at low idle so that problem is fixed and I saw that the slight wobble that had allways been in the crank pulley was gone.
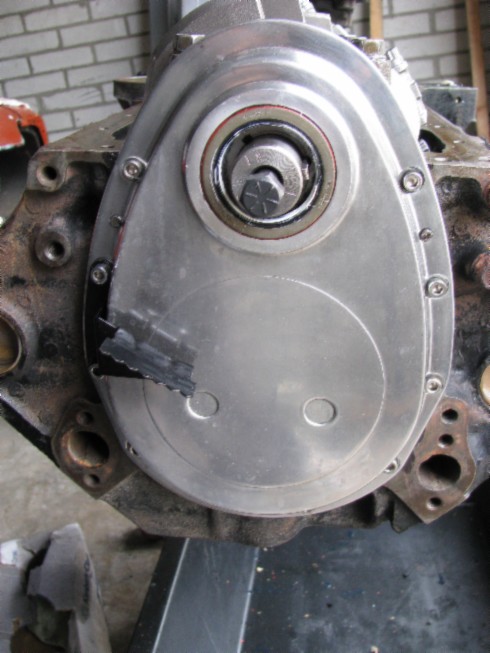
I did some research on probable causes and decided I had to check the flexplate first since it can produce such a sound when it is cracked/broken or when converter bolts are loose. After removal of the flywheel cover I found there were pieces (teeth) of it broken off..... I mounted the starter the same way as it came off, but maybe alignment was off for the new flexplate?? I disconnected the torque converter from the flexplate and started it again and there was no strange sound so the first thing was to replace the flexplate with the old one again to see if that is the problem. By now I am able to take the motor out in approximate 2,5hours, I guess it gets easier when you do it more often.
The flexplate had no crack but teeth were broken off, I checked it with the old flexplate and it was identical, teeth/diameter/bolt holes so no reason why the teeth were broken since I mounted the starter motor exactly as with the old flexplate. This was a brand new SFI approved flexplate from Summit, the material was just too brittle. Really pissed off about this....I didn't even bother to contact them because sending it back costs more then the plate itself. I put the old flexplate back on and re-installed the motor. After starting I noticed the sound was still there, oil pressure was perfect and the motor runs nice.....I cannot locate where the sound comes from yet, so further investigation is needed........
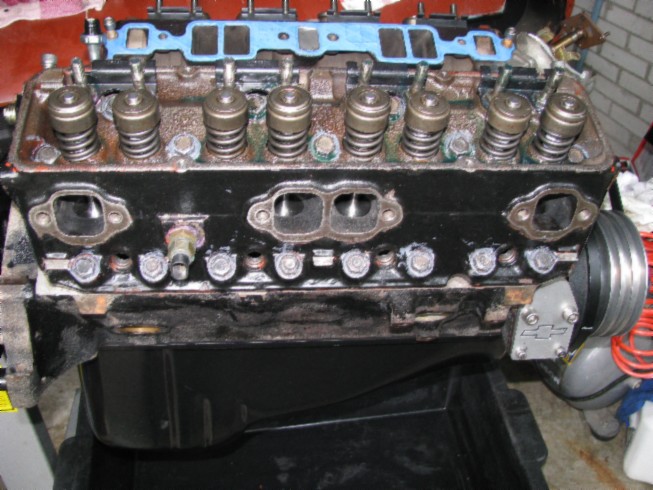
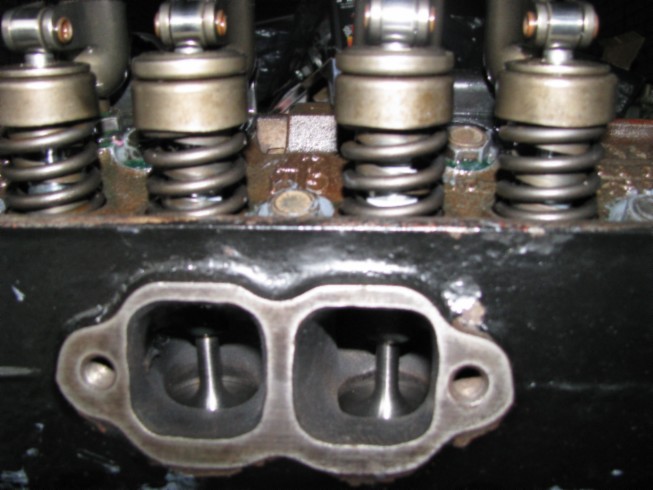
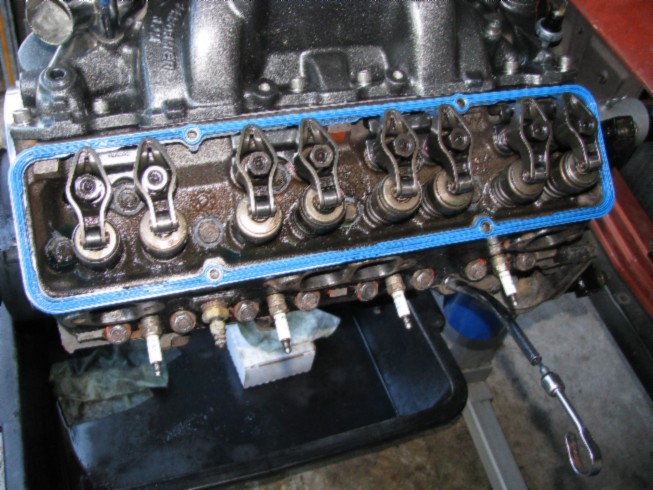
I checked the rockers with the motor running and saw all were getting oil from the pushrods and did not feel a difference between them. (which you would if a lifter is broken). All rockers seemed to operate as they should. Now I bought myself a stethoscoop (they are cheap) to find where the noise is coming from.
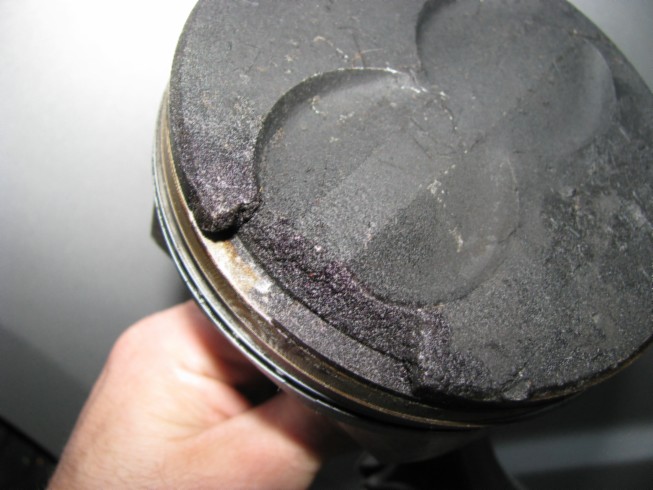
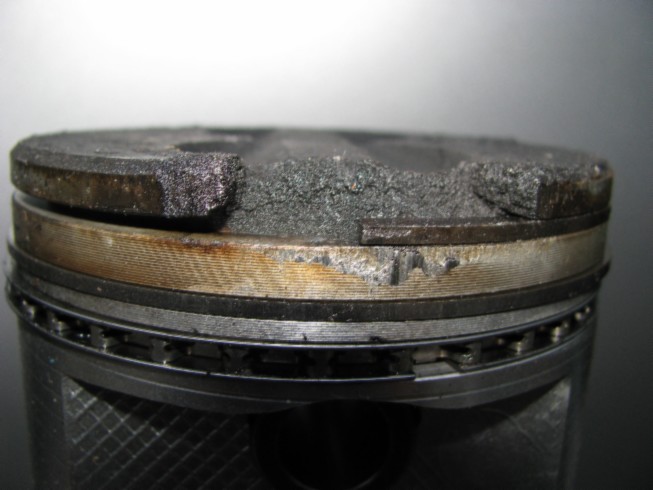
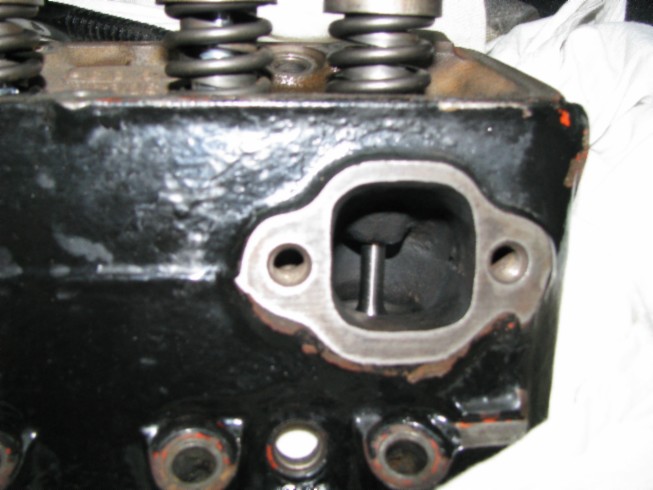
Still unclear where exactly it was coming from I decided to pull the motor again..... I removed all bearing caps, mains and rods and all bearings looked fine. The distribution chain and sprockets were fine too and nothing strange found there. I did find a piece of piston ring in the oil pump screen and saw the No. 5 spark plug looked different from the others. Probably I had some detonation last year and this might still be a result of that. Some f the rockers appeared to be loose so that is not okay either. Now I will pull the heads and see what is wrong....
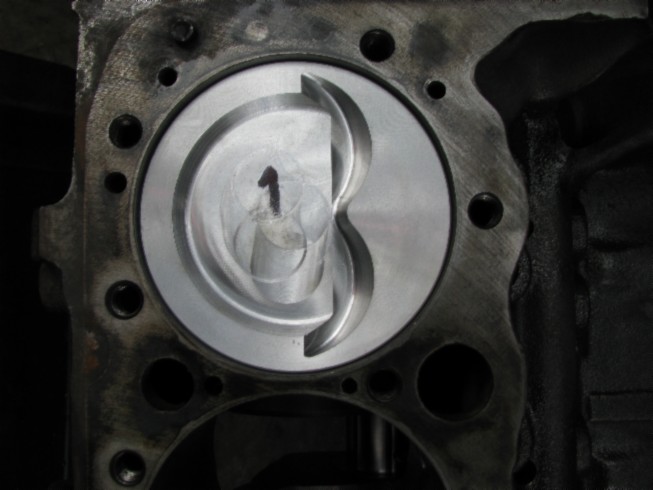
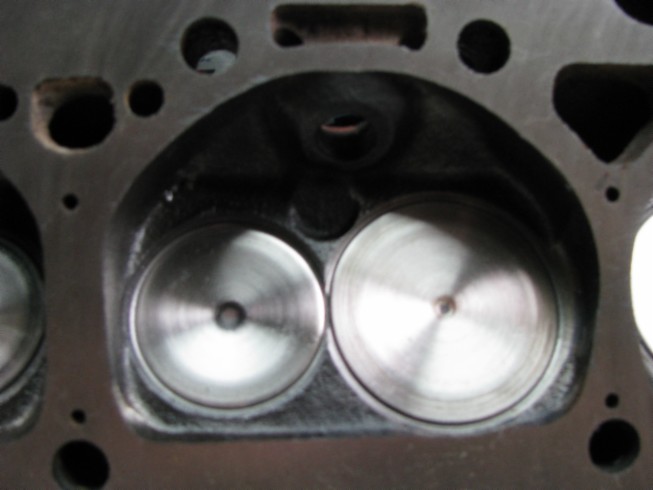
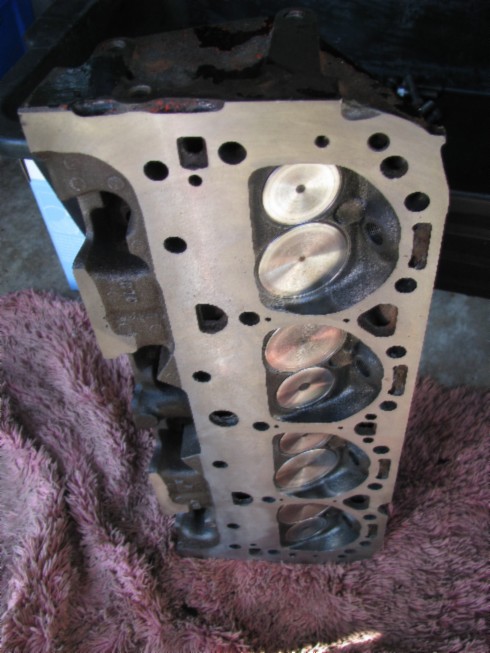
Pulled the heads and found what I allready suspected/knew, the no. 5 piston was missing a piece above the top piston ring. The heads look very nice so I guess the piece of piston did find it's way through the exhaust valve. I completely took the motor apart this time and brought it to a machine shop for a hone, new cam bearings and the heads to be milled. I bought me some tools to re-install the pistons and grind the valves into the valve seats so everything will be fresh again.
As soon as I hear from the machine shop I will order new pistons/rings and then in 2 or 3 weeks I can start re-assembly.
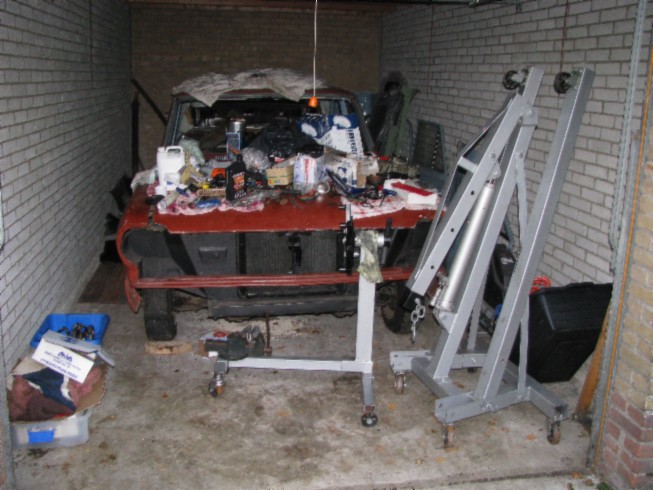
I cleaned up the Nova garage and put the Nova all the way to the back to create a bit of workspace. The hood was a perfect table :-)
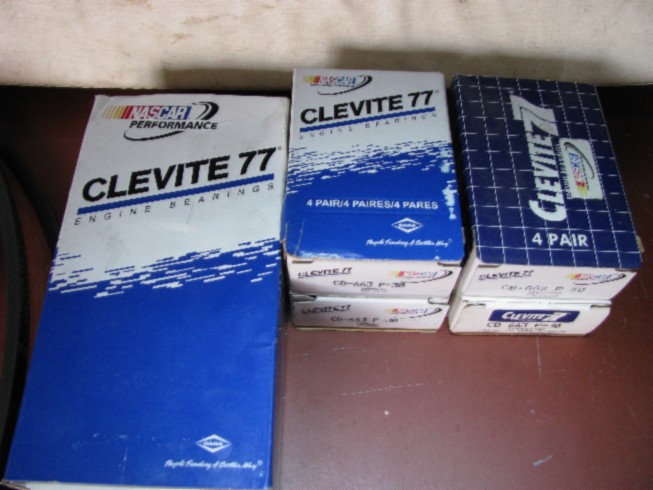
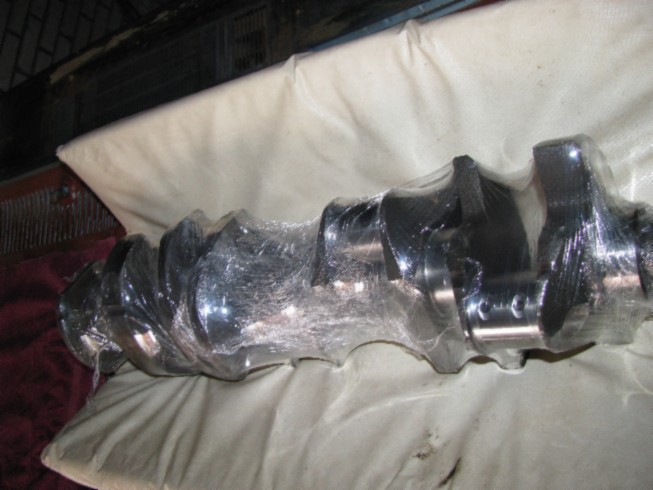
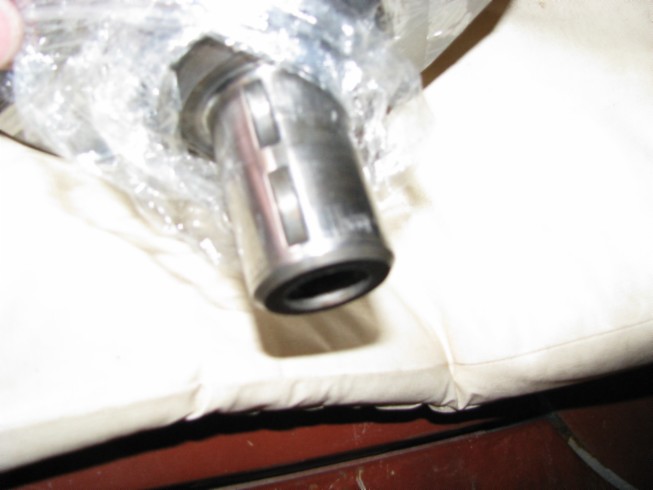
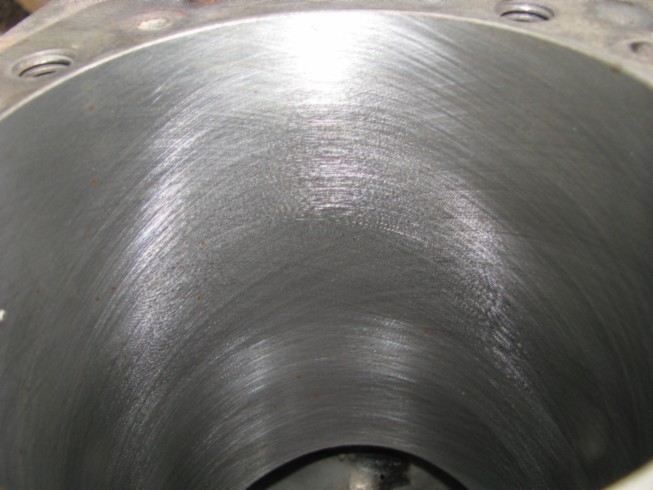
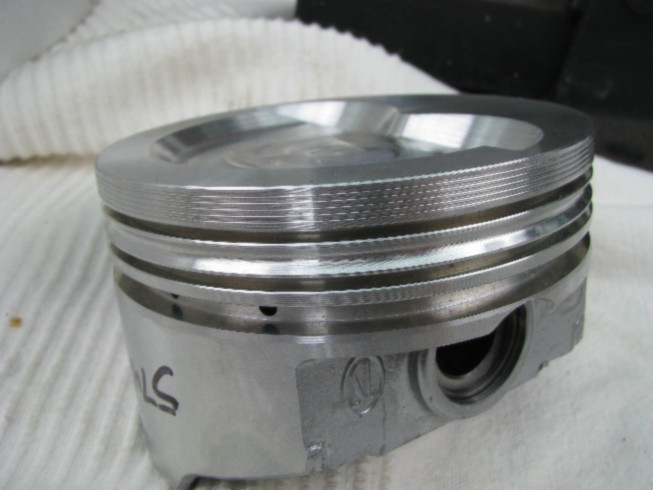
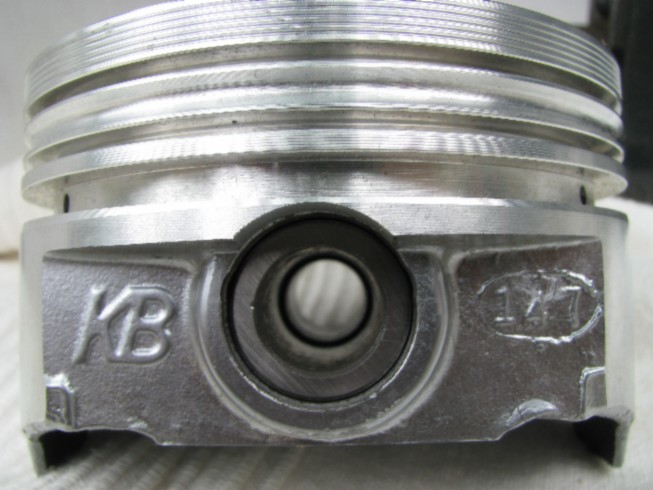
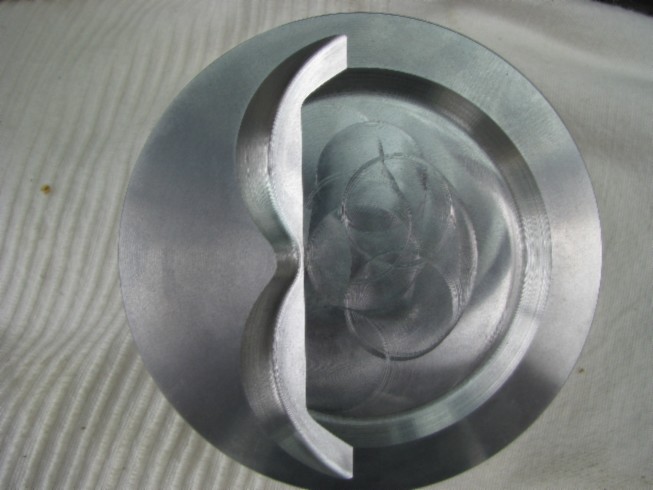
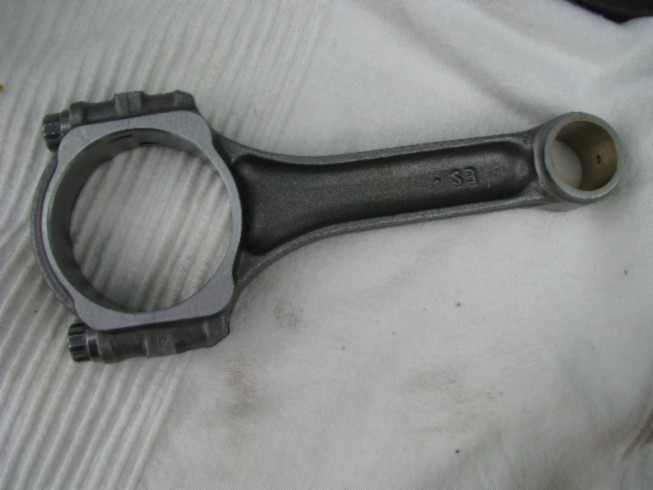
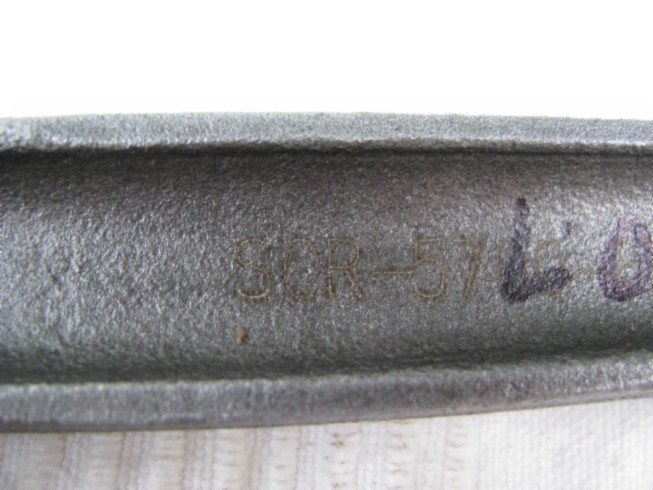
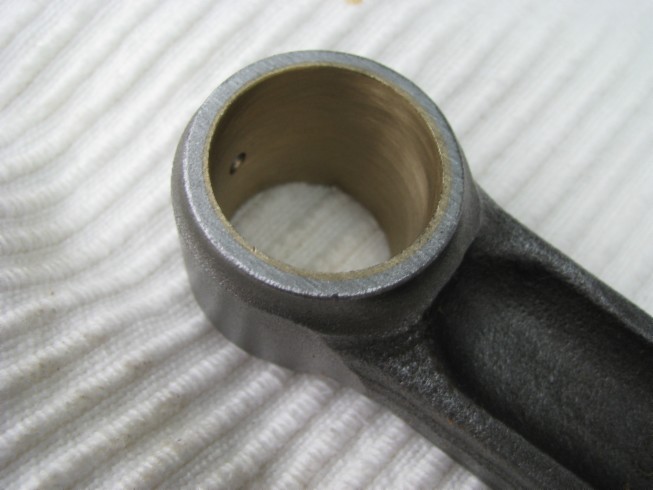
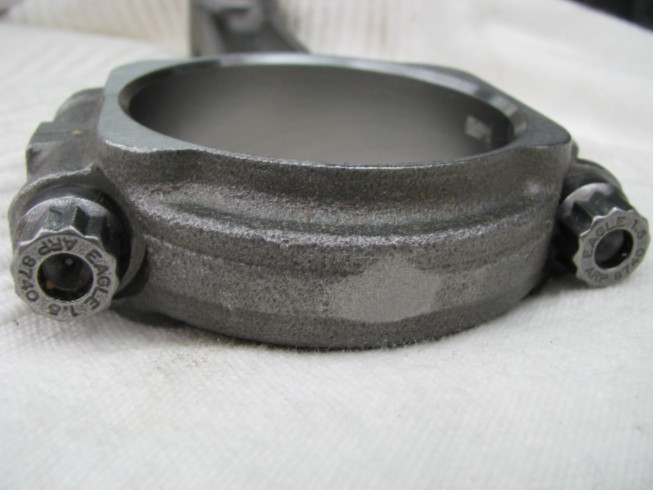
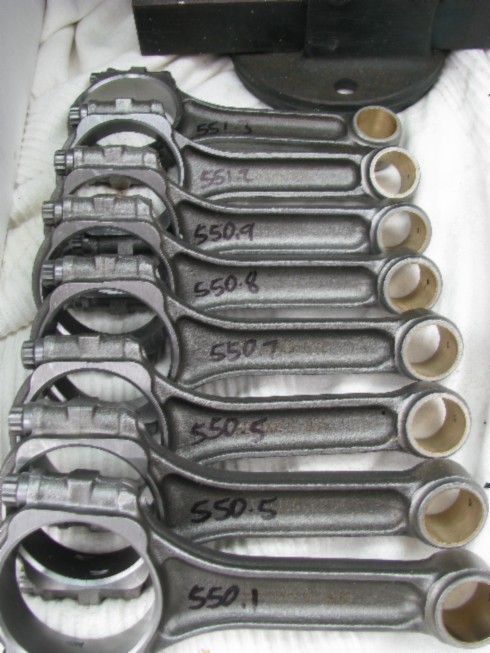
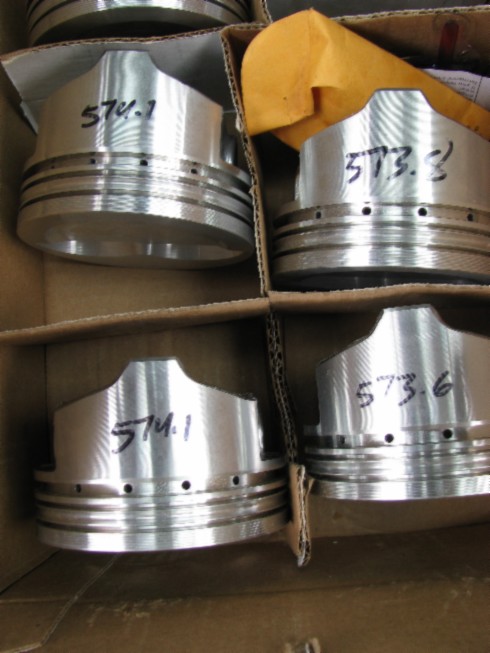
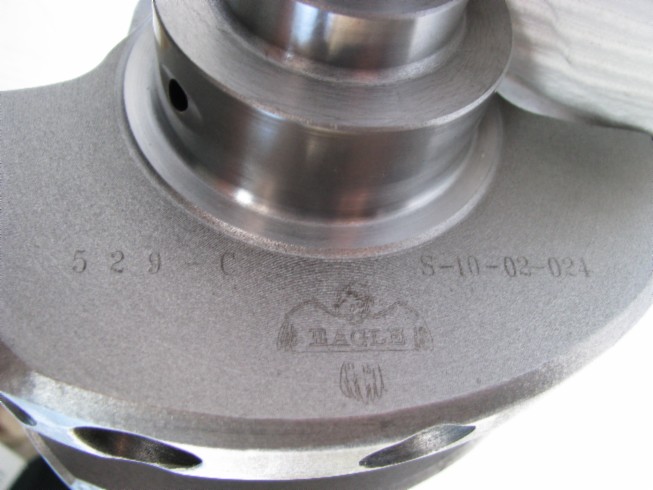
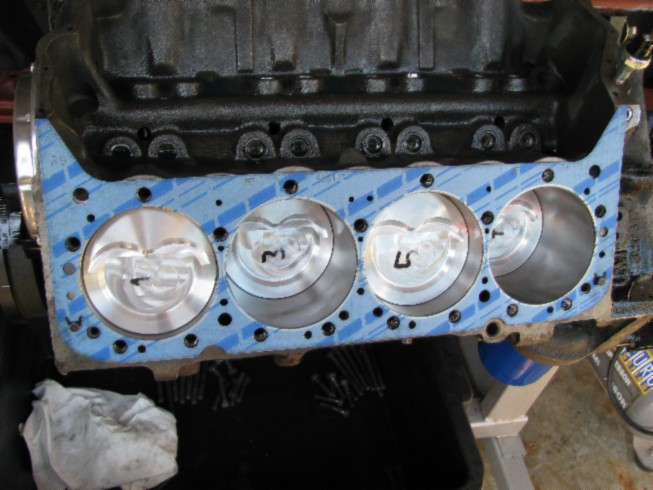
The bores were not bad but too wide to get away with just a hone so it needs to be bored/honed 0.040 oversize to 4.165" The pistons I chose have an 18cc dish to drop the static compression from 10.5 to 9.2 so the motor is less prone to detonation and I can get away with regular fuel. The shop had a very good deal on a complete rotating assembly and difference in shipping was only $100 between just pistons or the assembly so I decided to put everything in new. I now have an Eagle cast crank, Eagle 5,7 I-rods, Keith Black Hypereutectic pistons, Clevite 77 bearings, new balancer and flexplate. It now will be a 409cui SBC (Small Block Chevy).
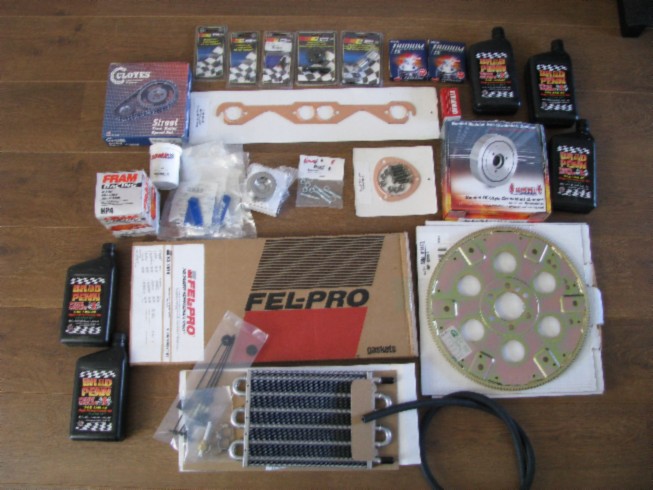
The parts came in 2 boxes weighing in at 43,5kg together....that's heavy! I ordered through www.CNC-Motorsports.com, their prices are very good, shipping costs were okay too and no (25$) handling costs which some other companies have. I bought some carburator parts from CNC-Motorsports 6 years ago and that order was still in their system when I logged in online. Defenately a company I will use again.
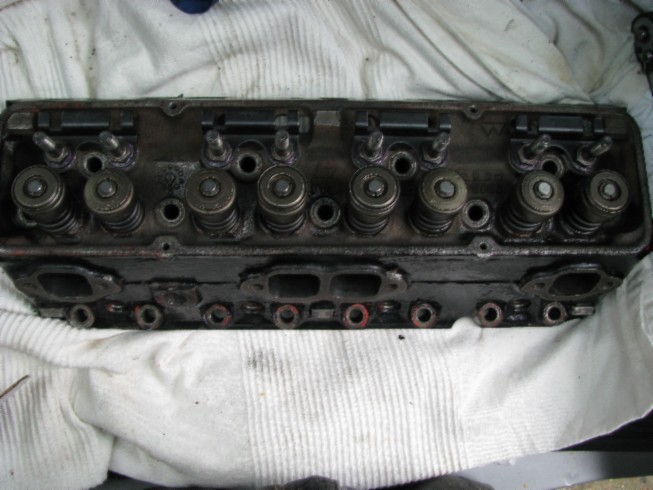
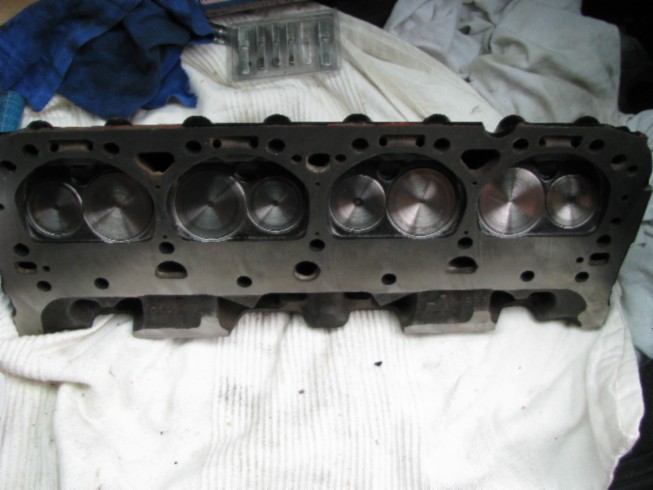
At the machine shop (Jacco parts in Rijsenhout) the heads were cleaned and we saw the valve seats were bad, so they had to be re-cut. With the valves grinded, new seals and milled surface the heads are now completely rebuild.
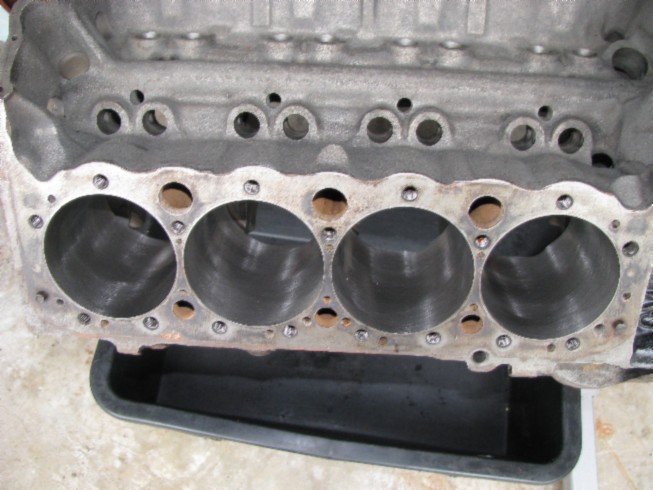
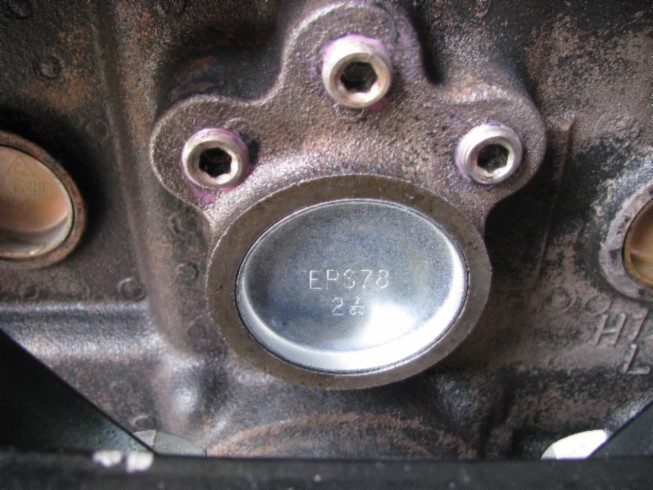
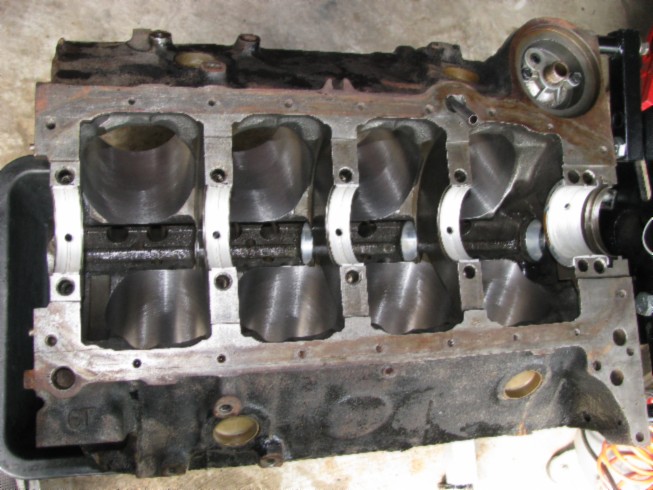
When I got the block and heads back from the shop they look great....allways nice to see freshly machined parts. I started the assembly by putting the block on the motor stand and cleaning it, then plugging the oil galleries, installing the oil dipstick tube and pressure release housing for the oil filter . I ran a tap through all threads to make sure they were clean.


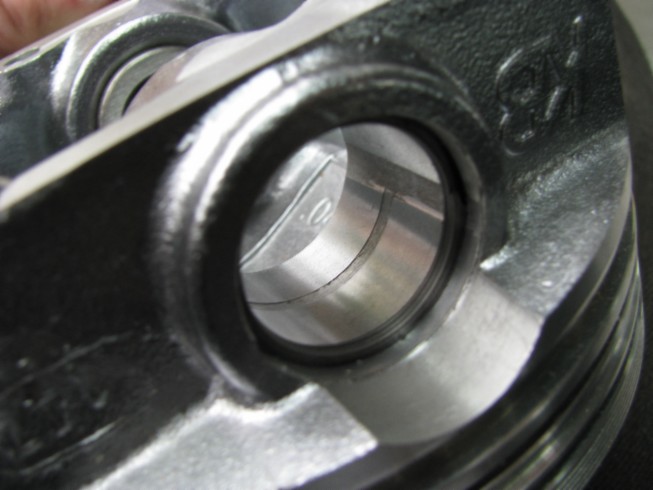
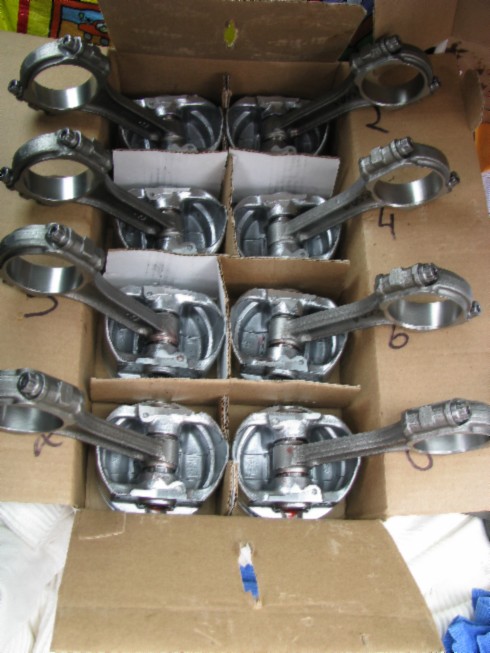
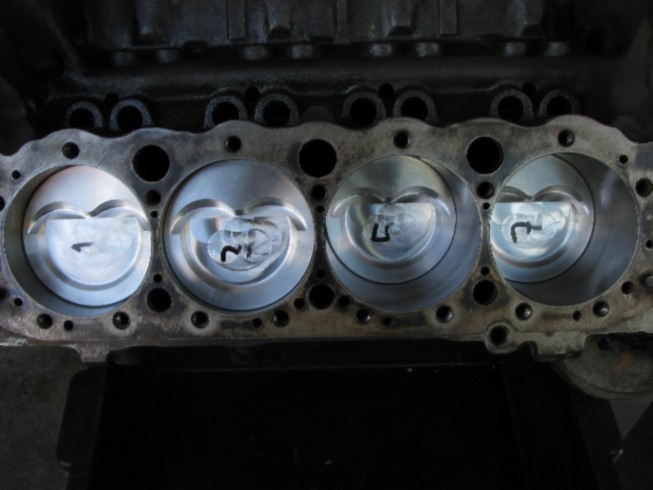
Then I installed the the pistons on the rods, first install one wrist pin lock ring and then make sure the piston and rod are in the correct position in relation to each other. The piston has to go in a certain way so the valve reliefs are "aimed" in the right direction. The rod has 2 sides too, 1 side has a bigger chamfer on the big end side to clear the crank. When assembled with the supplied special lubricant I did a final check and installed the second wrist pin lock ring. You have to make sure these lock rings are seated properly because it can destroy a lot if it comes loose. I tried to use the heaviest piston with the lightest rod and to get each set as close to each other as possible.
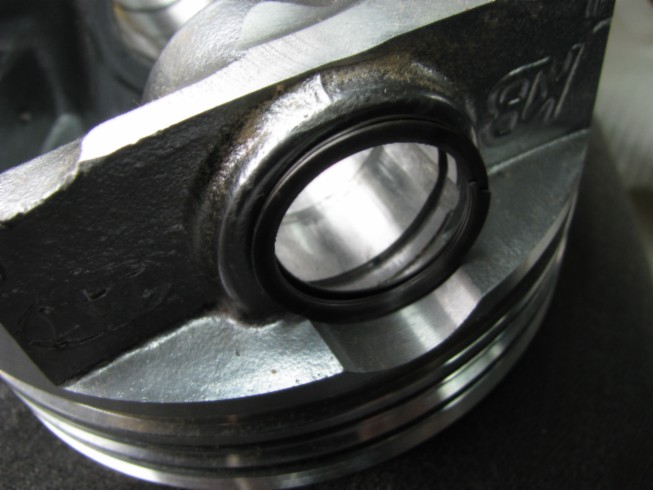
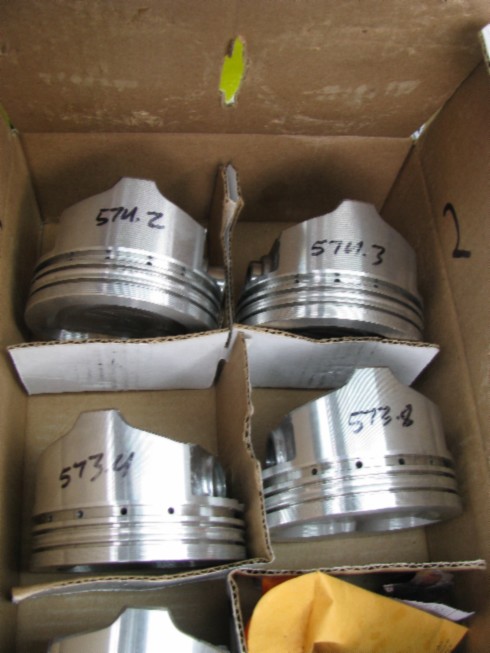

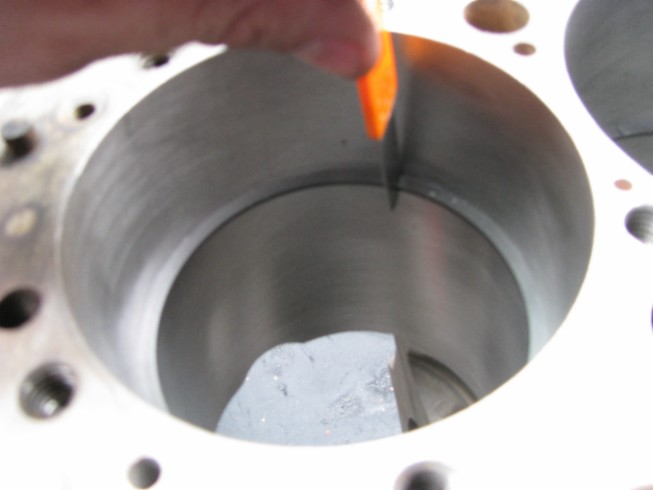
Next was filing the top piston rings to size, the specific size was indicated with the pistons for each application. You have to install the ring in the cylinder, push it down using a piston so it is square in the bore and measure the gap, then take it out, file it a bit and measure again until you reach the desired gap. After measuring I found the 2nd rings and oil control rings were allready correct.
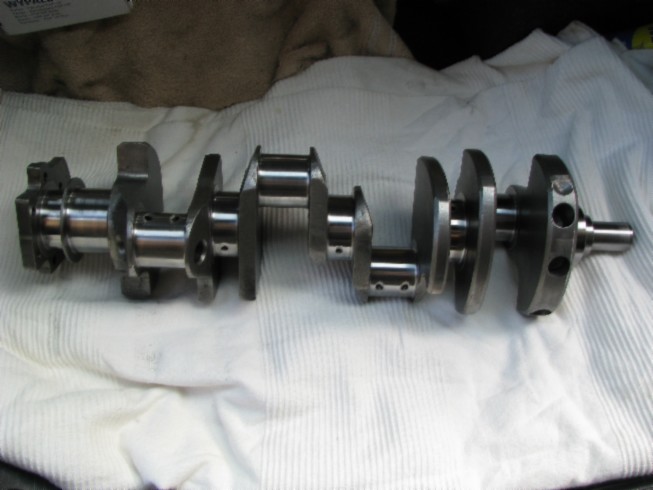
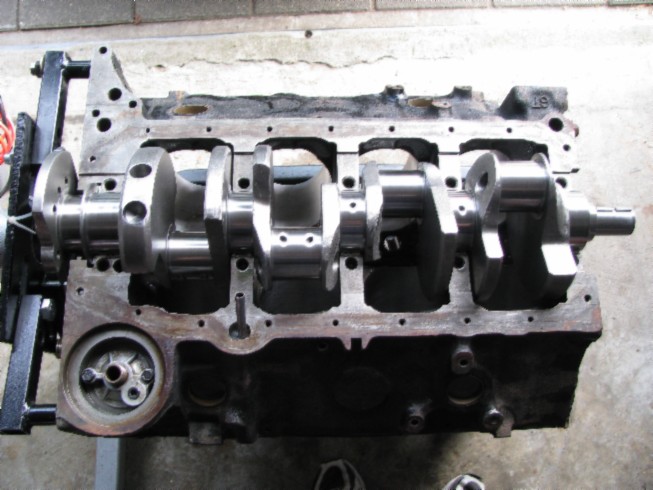
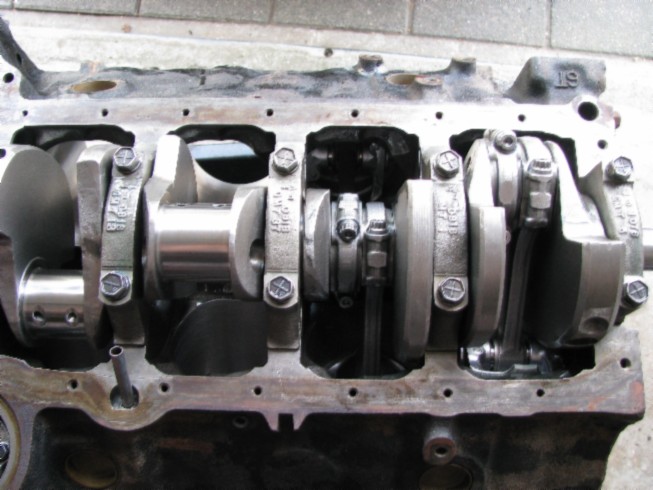
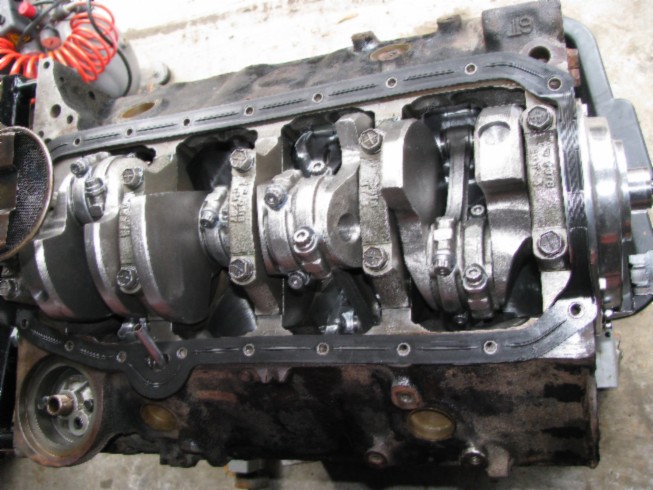
Now the main bearings went in, I cleaned the crank and installed it and put on the main bearing caps and rear seal.
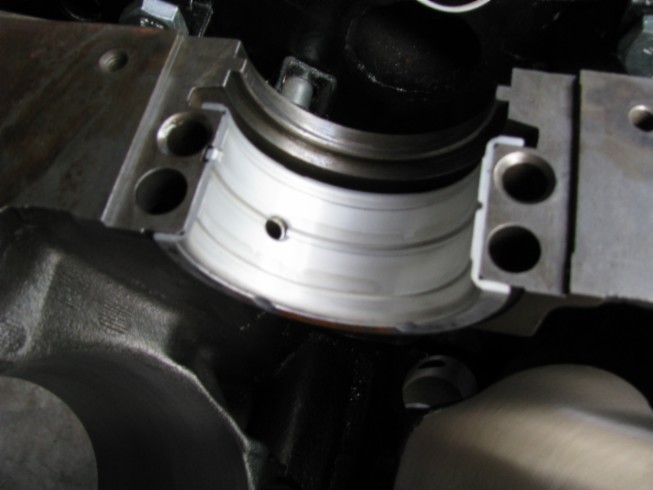
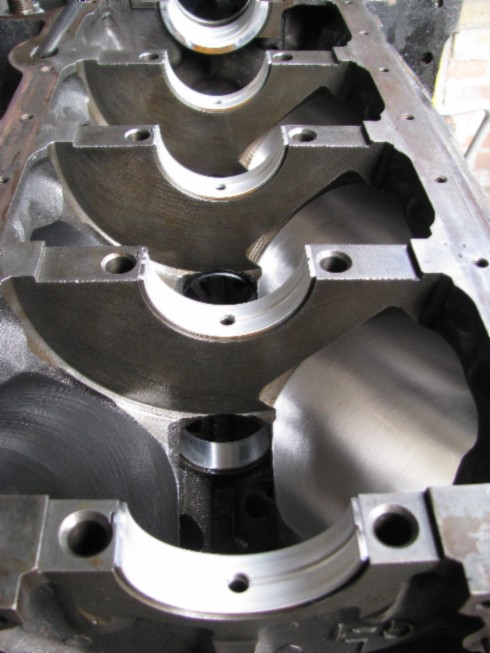
Installing the piston rings is a job you have to take your time for, being careful not to break them and making sure they are installed the right way . I had to loosen the main bearing caps, they are a very tight fit, even with the bolts out.

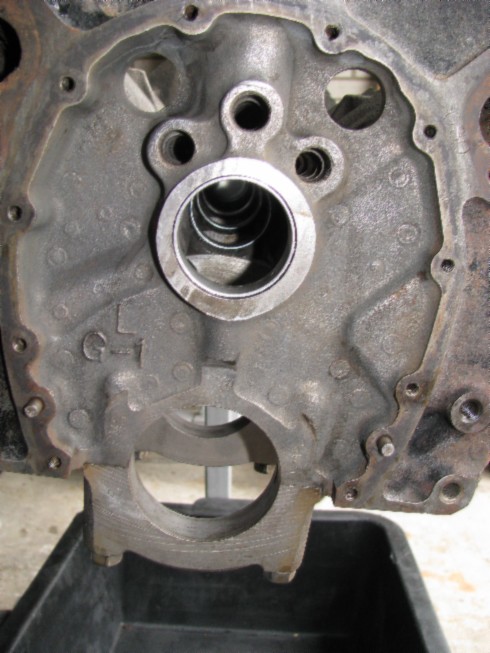
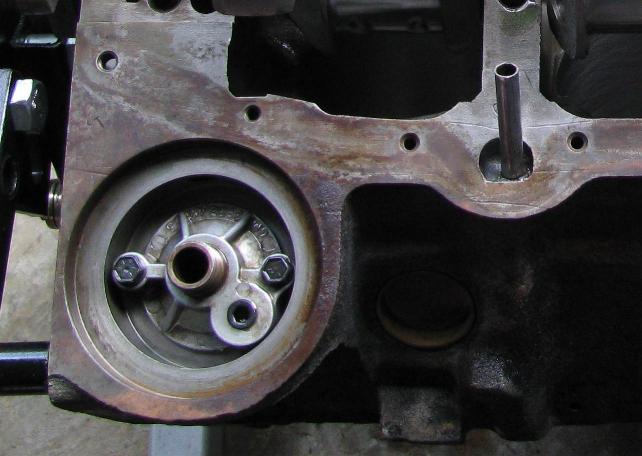
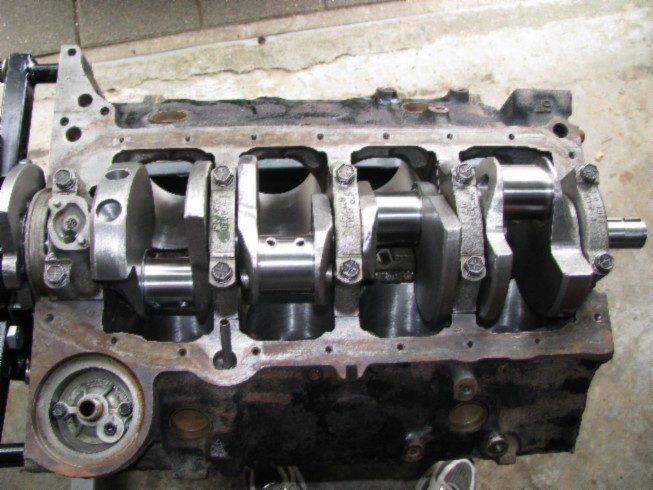
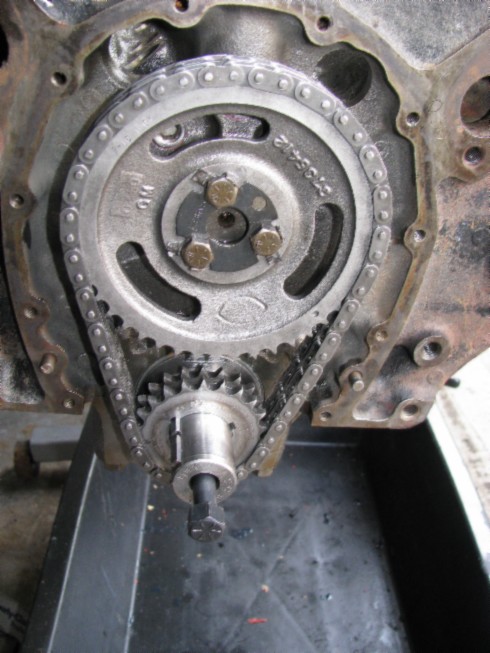
Using a spring compressor I gently tapped the pistons into their bore and connected them to the crank. After each set of 2 I turned the crank and checked for bind or any other problems. When all 8 were installed it was time to put on the distribution crank gear. Only thing left to do on the bottom side was the oil pump.


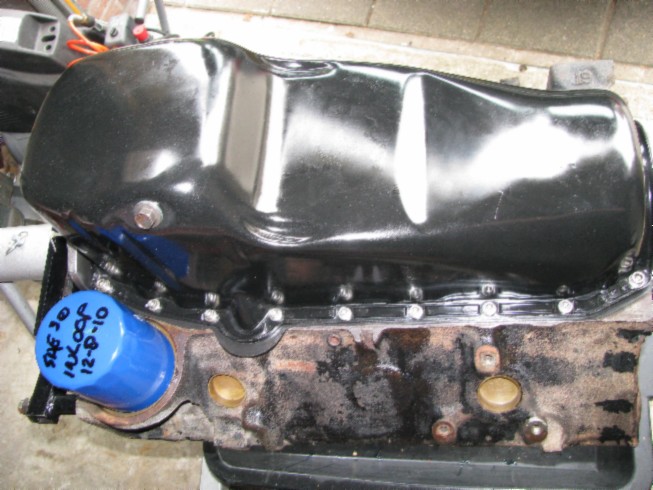
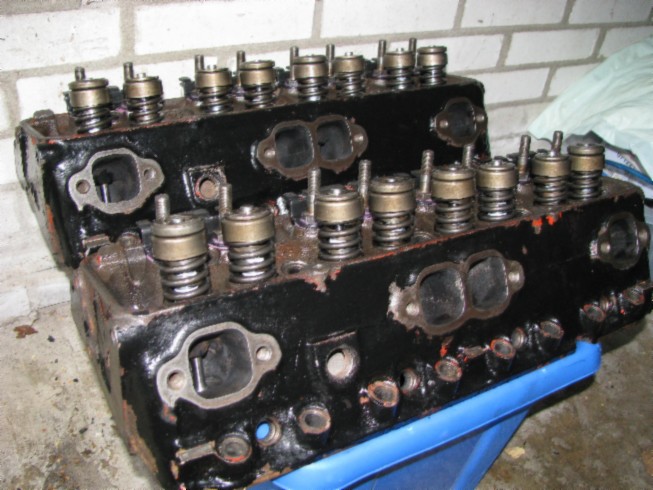
The only rotating part I re-used was the cam shaft since it was still in good condition and I was happy with how the motor performed before. It is a Crane cams Part Number: 113801 Grind Number: H-278-2 with following description: "good idle, daily performance usage, mild bracket racing, 3000-3400 cruise rpm, 9.5 to 10.75 compression ratio advised, basic rpm 2500-5500". With the way I use the Camaro and my set-up this works really well. I carefully put it in its new bearings and installed the new distribution sprocket and double true roller chain. Now the distribution cover could be installed followed by the oil pan and oil filter. The balancer went on together with the crank pulley and the bottom end was oil tight. (untill I dropped a ring in the valley pan and had to take the oil pan off again....with oil in it, this is when you really appreciate the re-usable 1 piece gasket) The lifters went in next, I stored them in order so they could go back in the same position they came out which is important since the cam and lifters wear into each other.


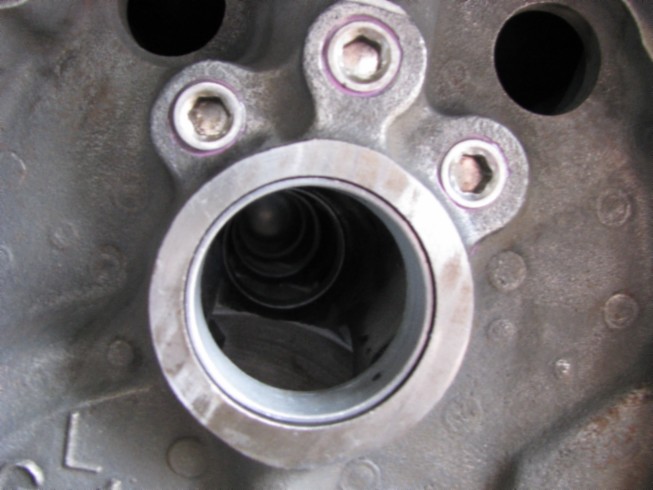
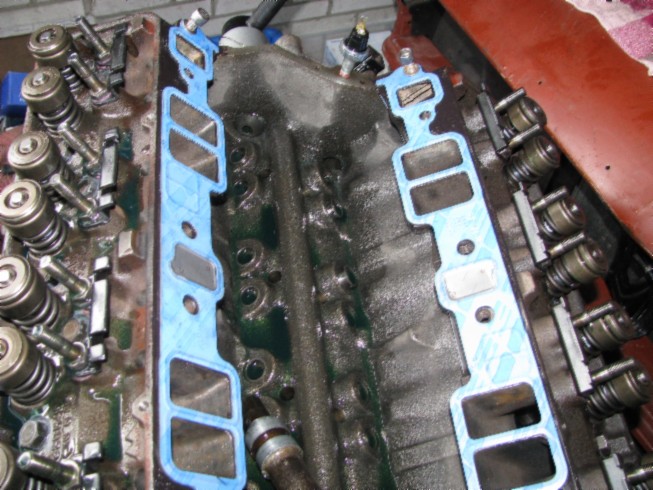
The heads were done by the machine shop so ready to be installed which saved me some time. I just had to put on the guide plates and studs with sealer. Again cleaning and degreasing the head surface and the block before putting the head gaskets and heads on. The thouroughly cleaned head bolt threads were given a dab of sealant on the threads and some molykote under the heads before they were torqued. This is done in 2 steps and using the right sequence, after reaching final torque I left it to rest and rechecked twice later.

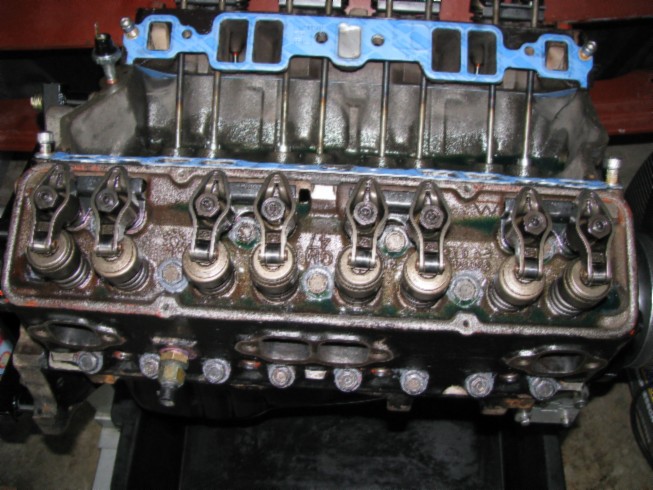
I used my primer tool (old hacked distributer with the gear removed) to get air out of the oil system and oil pressure. Do not forget to temporary install the oil pressure switch, ask me how I know ;-) With the heads installed the valvetrain was next, pushrods and rockers. For each cylinder the valve lash was set and lock nut set into place and again oil pressure was build turning the crank small bits untill oil was coming ot of each push rod. This way I was 100% sure the oilpressure would be there on startup right away.
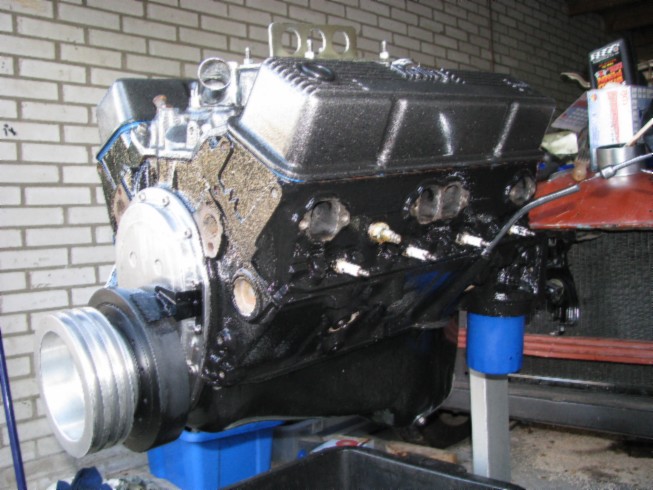
The intake manifold now went on, oil pressure sender/switch and I had complete motor. Since the block was washed at the machine shop it took off most of the paint, so now I had to repaint it. Just like the last time I used 2 component brake caliper paint which is resistant to high temperatures. I just brushed it on which is far easier than spray painting it and I am happy with the result..

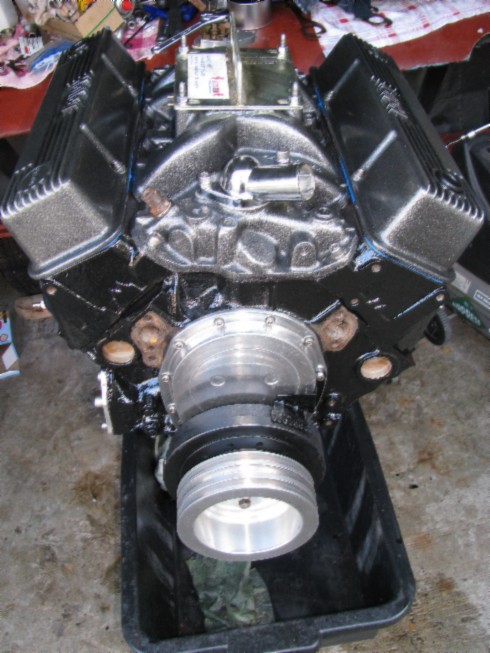
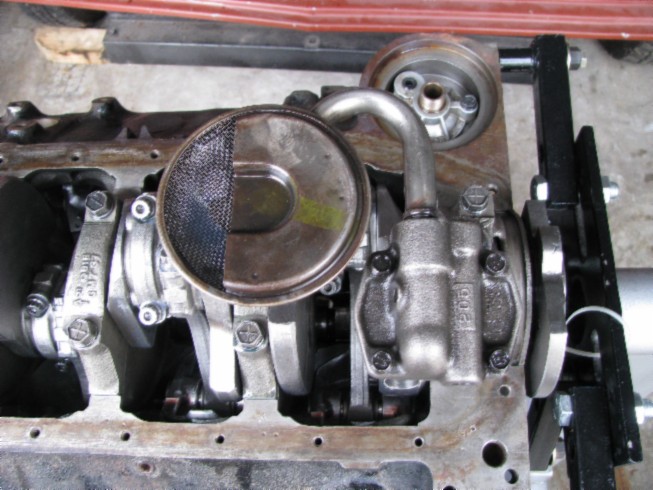
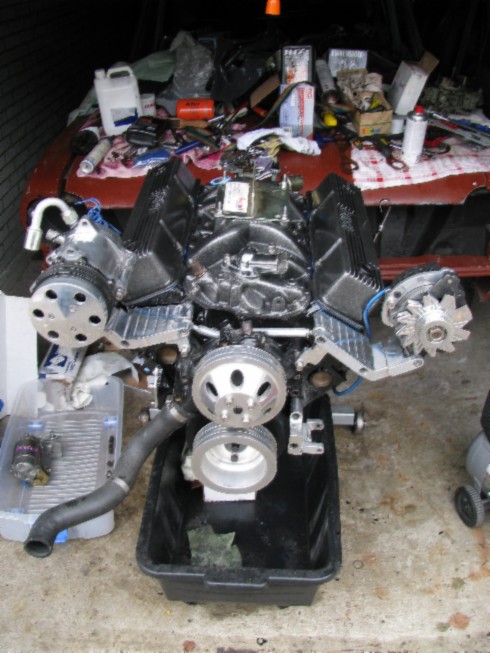
Now the accessoires could be mounted to the block to get it ready to go back in the car. Shimmed the starter motor and distributor, just set it at an approximate few degrees advance. I've done this job so many times it is becoming a routine. I decided to run it on LPG for now since this is a cleaner fuel and my Holley is running a bit rich still so that would give a lot of carbon deposit. Also the Technocarb does not need a choke, on LPG the motor allways runs right even when cold.
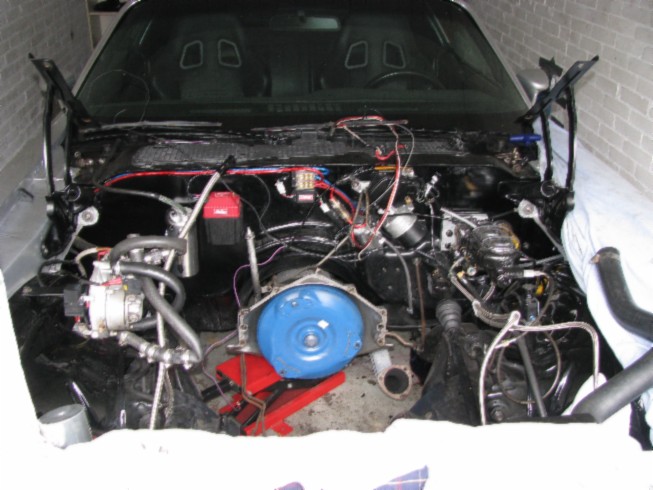
After installing the motor it was time to do the first start. A final check on fluids and everything that had been disassembled and then the first start with the coil wire removed. The starter sounded good and the oil pressure was there right away as expected. Now the coil wire went on and on of the more exiting moments this year came....startup.... It fired right away but stopped when I let go of the throttle so I adjusted the ignition a bit, started again and it ran very nice, no strange sounds so I was very happy! 16-08-2010 is a day to remember....!
As I write this it appears to go very quickly but in real life this takes some time....constantly cleaning, measuring and checking if everything fits as it should is not something you want to hurry. I think I spent about 50~60 hours the last time to get the motor out the Camaro, take it apart, trips to the machine shop, build it again and installing in the car, I do not want to think of the money spent :-(.
I will try to sell the 400crank, 5.7 rods, (with bearings), balancer and flexplate I have left over to get some of my investments back.
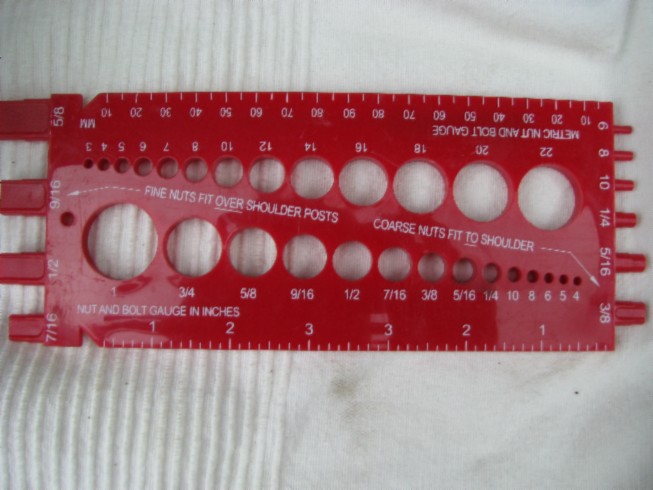
Just had to show this, a very handy tool I once bought to check bolts/nuts sizes.
At first I thought about just leaving the car for a year and save some money to do the rebuild but when (before the motor trouble) my sister in law asked if I would drive her on her wedding day I said yes. Even though this has cost me a lot of money and stress due to getting the car ready in time I had to do it...a promiss is a promiss....and I do not like people who do not keep their word. In the end I have a rebuild motor which should last me for years to come.
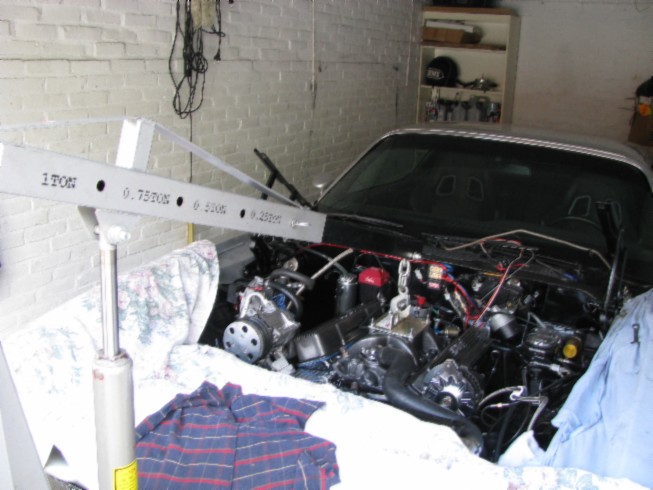
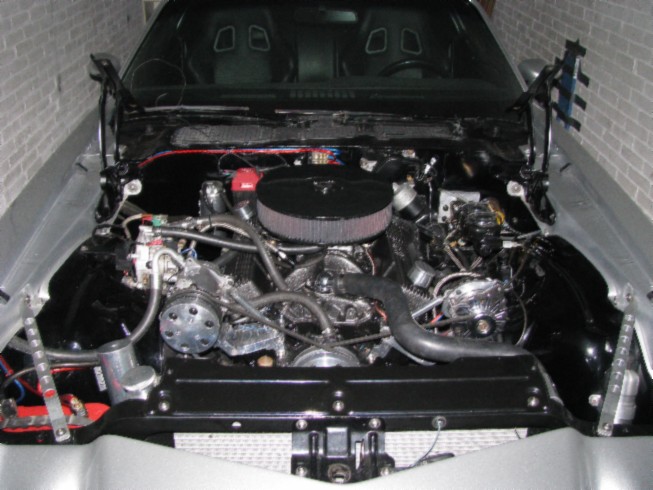
Now it is standing there as if nothing happened....
You can reach me by e-mail at: pro-touring @ hotmail .com