My Camaro

page 3


Slowly rebuilding....

New pictures at last...... I have been working a lot on the car the last few months. The complete front suspension is in place now. I took the engine and transmission out and replaced the seals on the trans. The engine was treated to a fresh coat of Chevy Orange engine enamel paint. I replaced all engine bolts with stainless steel ones. Now everything is cleaned, painted or replaced the engine looks like new! One of the rubber motor mounts was broken so I replaced both. (if one is broken the other one will not be much better) What I felt was a difficult job was to put the coil springs in place. I removed the old ones with a jack under the lower A arm. ALWAYS BE VERY CAREFUL !!!!! People have been killed doing this. The amount of energy stored in the spring is enormous. When I did this I was standing on the inside of the frame. If it would have jumped I was out of it's way. To put the new springs in I needed an internal spring compressor. I bought it from Snap-On since they were the only one who could supply it to me in a few days. The car sits lower now and is a lot stiffer. I think it will handle a lot better now.

17"

I bought a set of 17"x8.5" wheels with a 4,75" backspacing (E.T. 13) secondhand. (cheap) They will give the Camaro a better look and better handling. I have not decided yet if I will use the center caps, I think without the caps they will look more agressive. The wheels need to be polished but that's just labour. The rears are fitted with 255 tyres and are a perfect fit. I think 275 will be no problem. The front wheels carry 245 tyres. I think I must make some new bumpstops for the spindles but I will wait untill the fenders are on so I can see if they will clear.

Things I can do at home.

I made a cardboard template for the new dash. After this I made the first attempt with aluminium plate. I had already bought two plates because I knew the first attempt never works when you have to build something from scratch. (at least not with me) I now made the second one based on the first one with some modifications. When I go back to the garage I can test fit it.
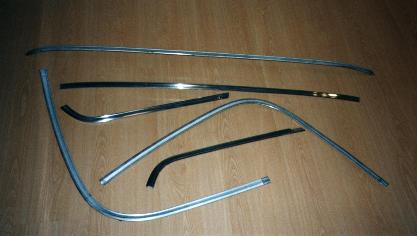
The window moldings looked terrible, they were dull and cleaning them didn't make it any better. Then someone told me I had to polish them. I tried that but nothing happened. I took some 300 grid sandpaper and started to sand it. I saw metal underneath the coating (anodizing?) but did not know if this was okay. If they would stay like this I was going to paint them black anyway so nothing could go wrong. With some chrome polish I polished the bare metal and in no time it started to look like real chrome. That put a big smile on my face! It's a lot of work, polishing these moldings, but it's worth it. Can you tell what's before and after?

At the moment I do not have as much time as I would like to spend on the car. I am expecting to become a father januari 2001 so I need to work in the house to finish everything. On top of that we also bought a new house which will be ready approx. september 2001. More news will follow as I make more progress.

Back.......

Continue.......

You can reach me by e-mail at: pro-touring @ hotmail .com