My Nova
page 24
November 2015 - March 2016

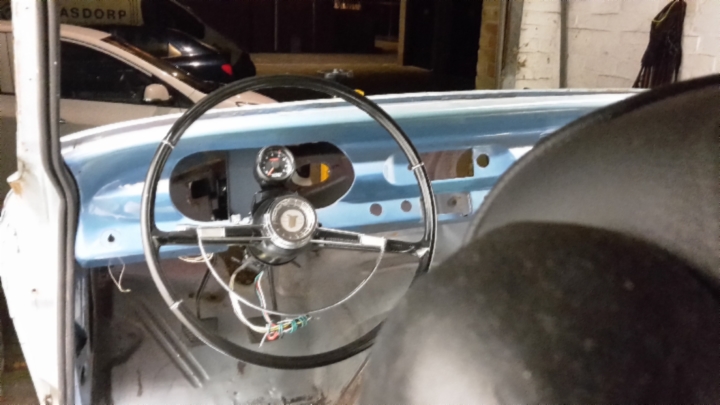
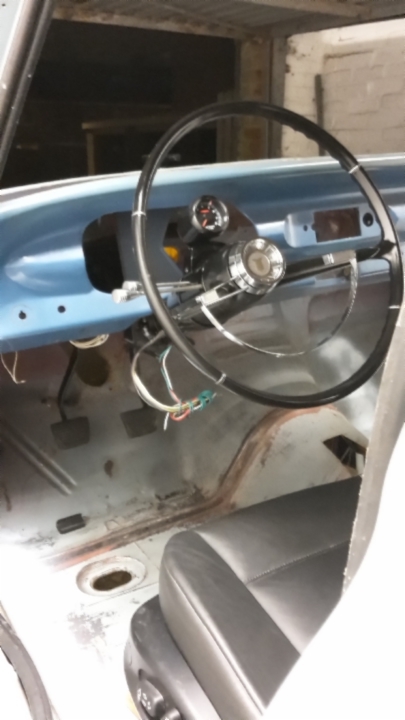
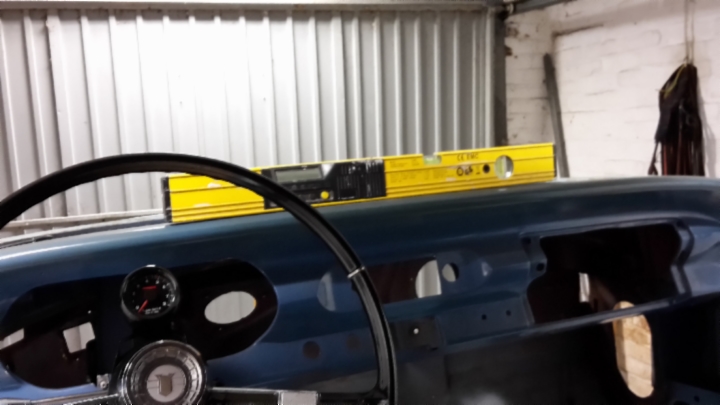
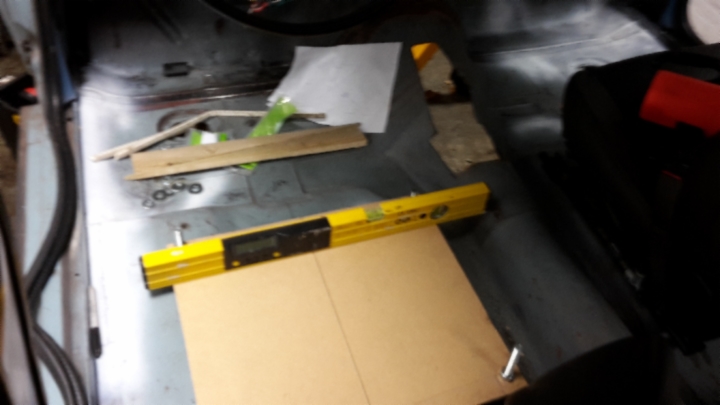
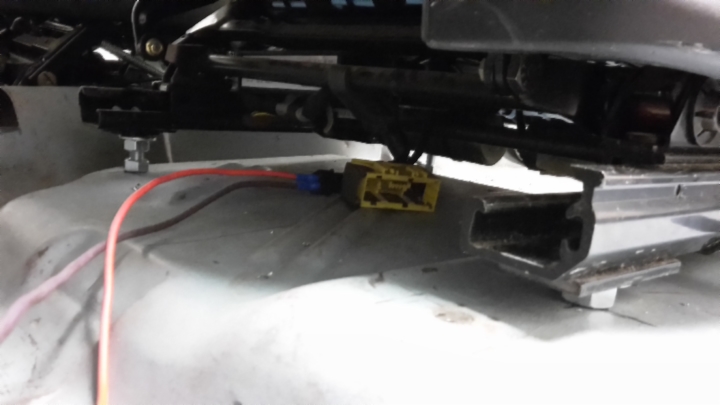
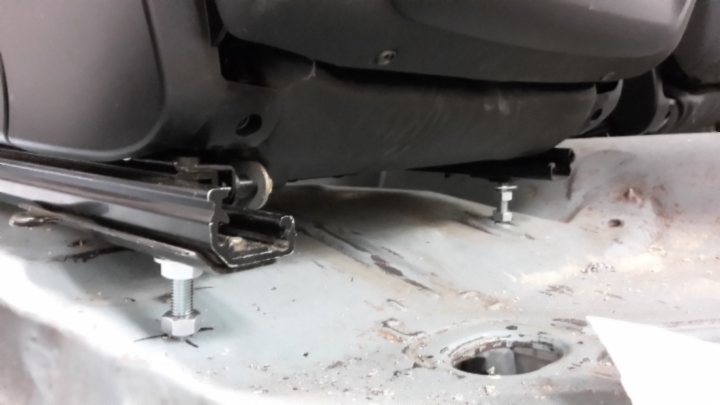
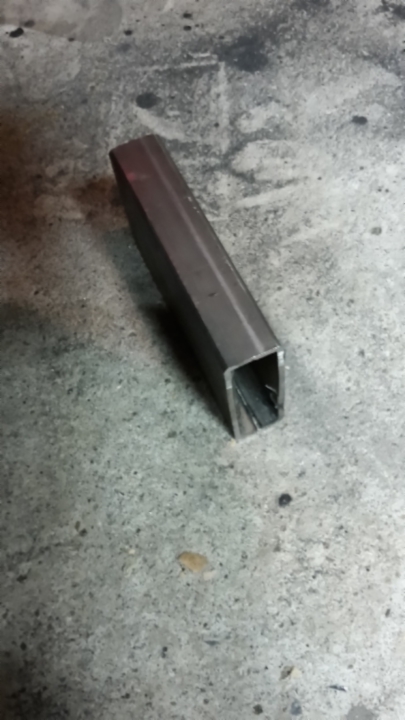
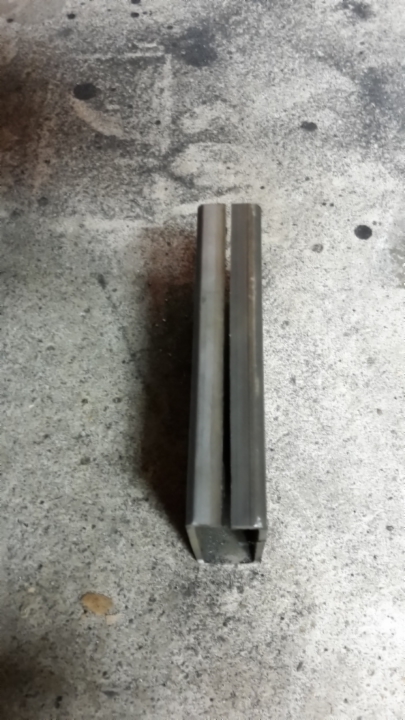
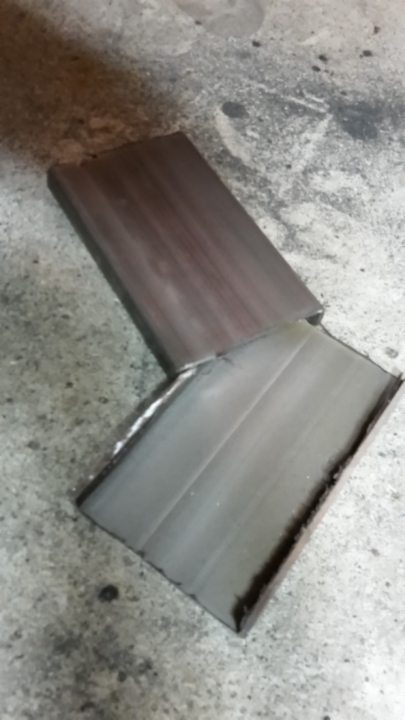
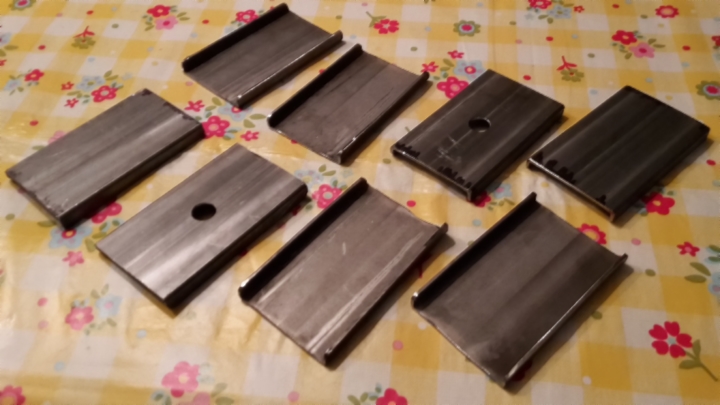
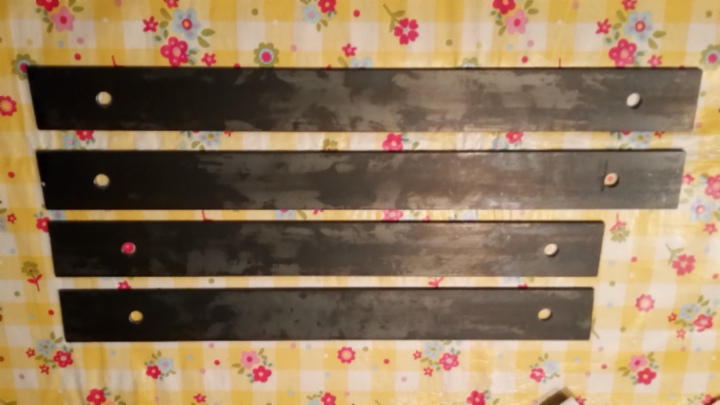
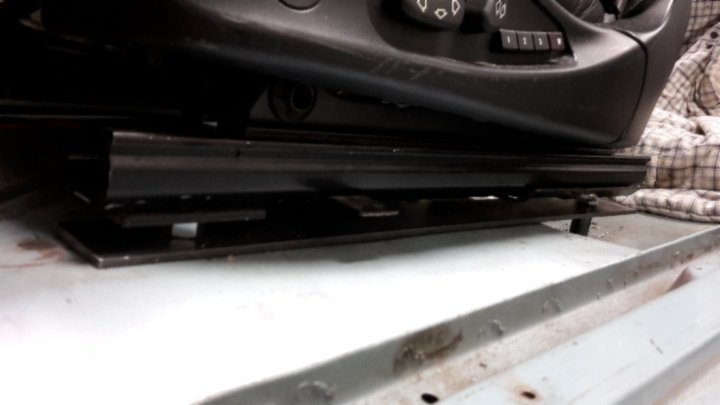
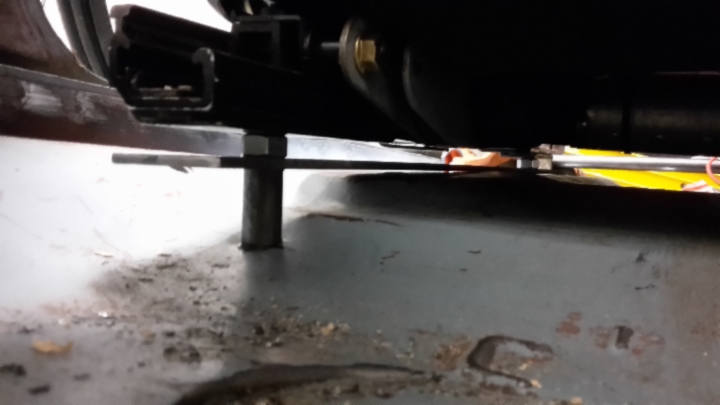
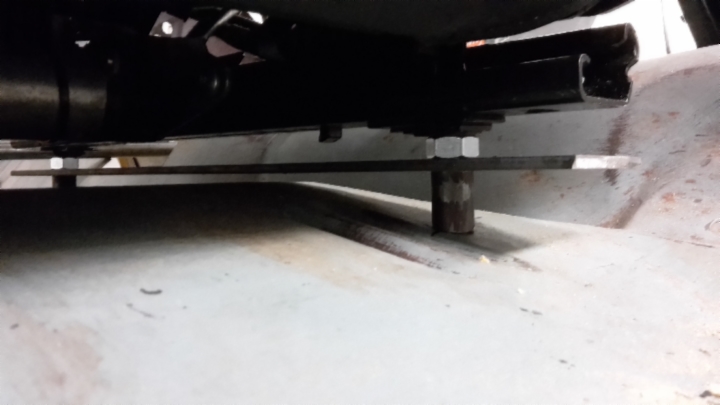
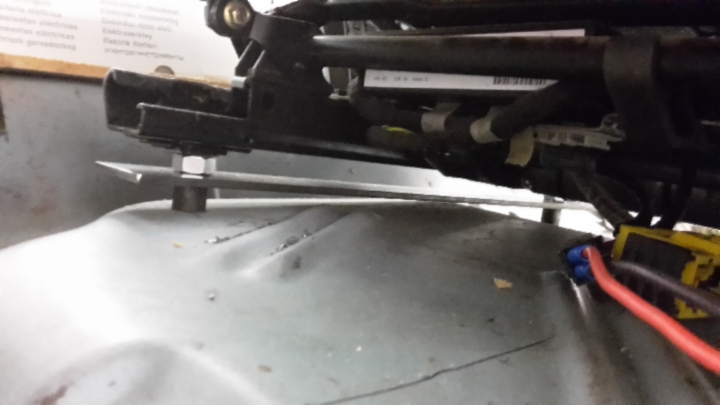
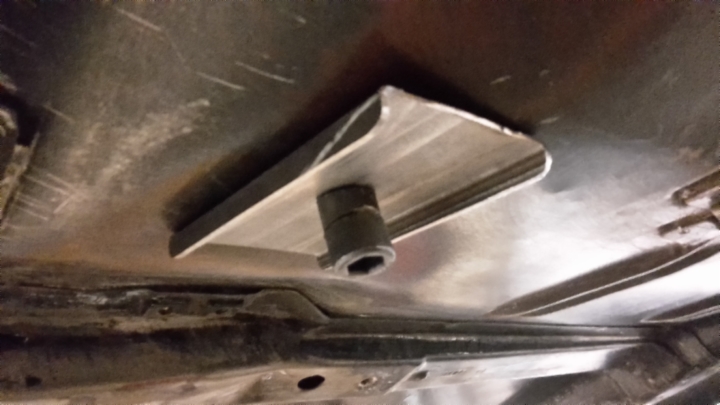
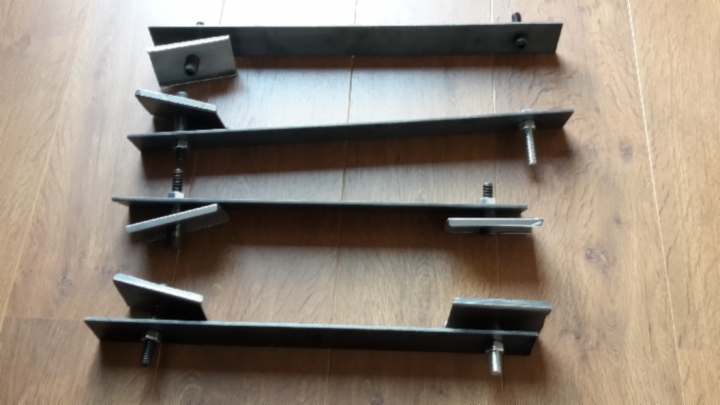
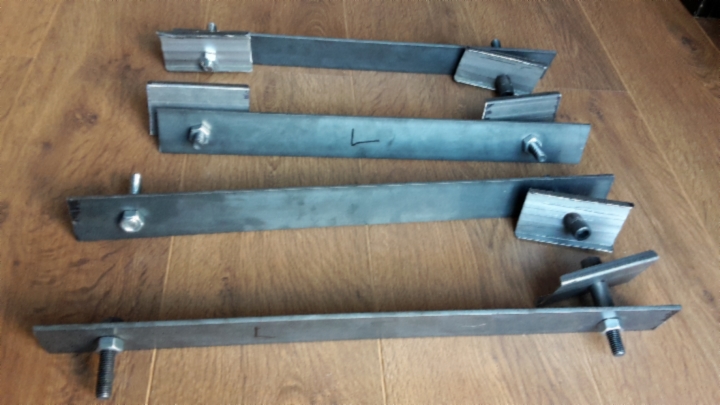
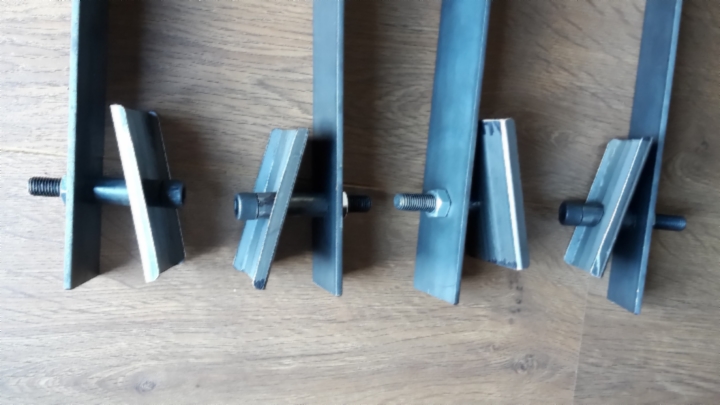
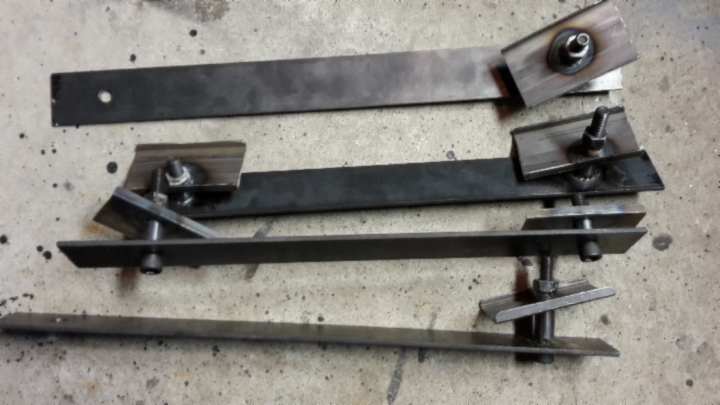
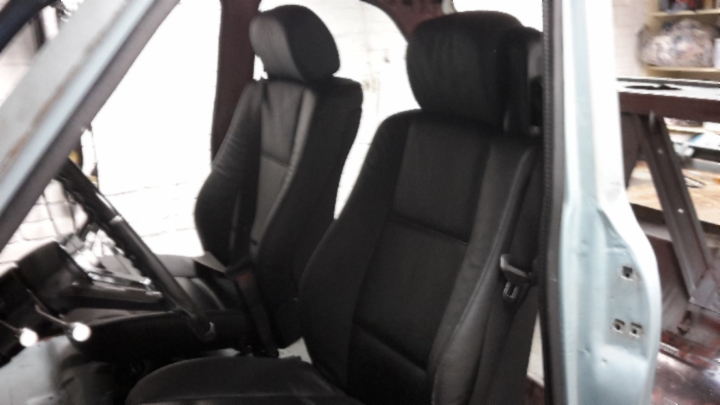
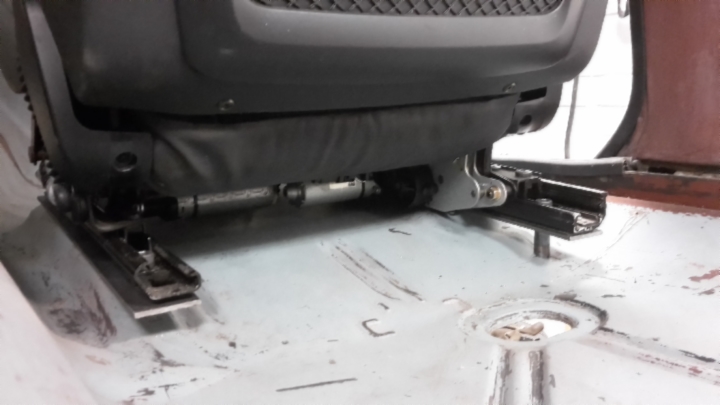
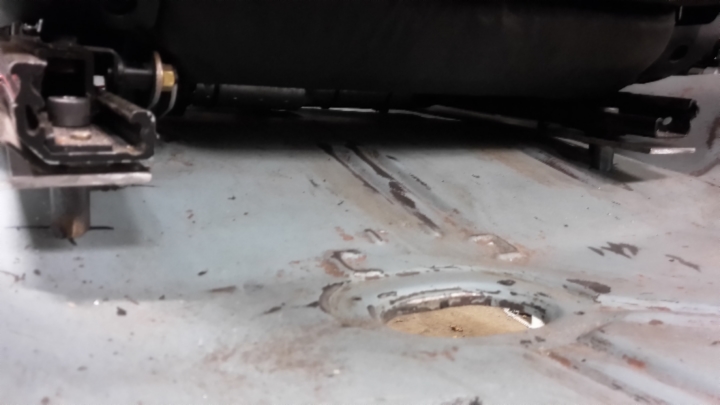
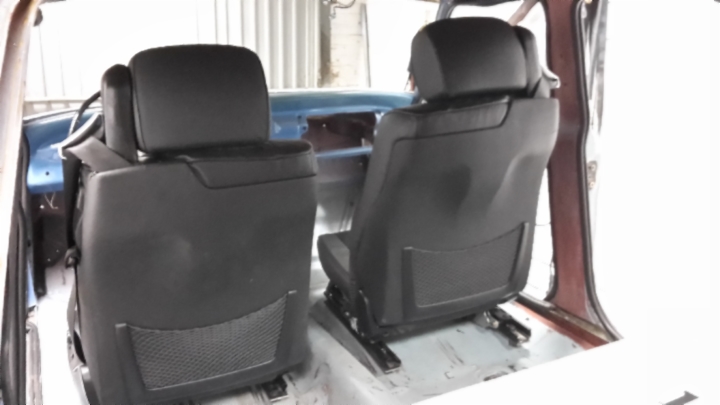
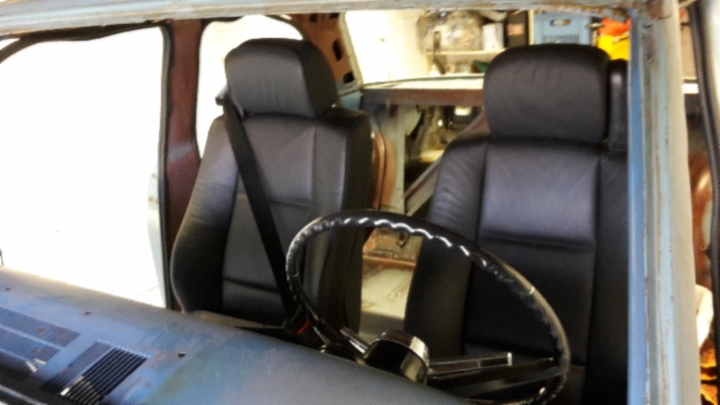
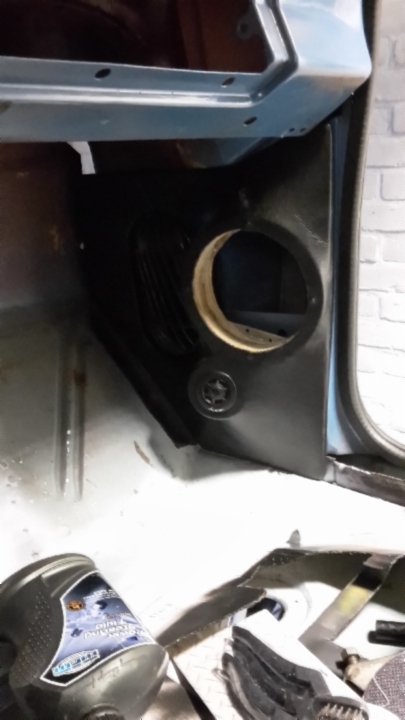
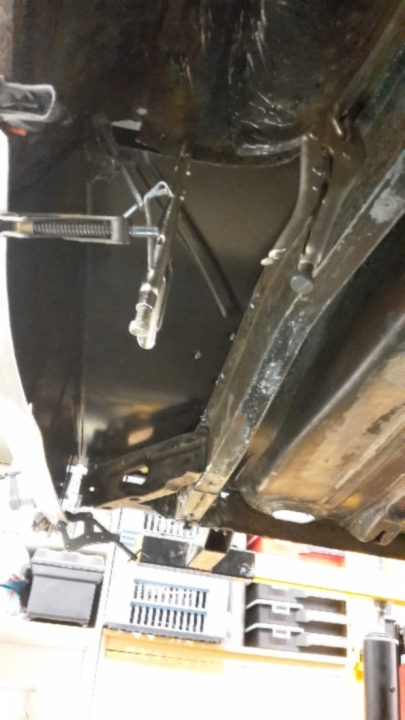
In order to be able to mount the front seats properly I first had to determine the exact position. I started by mounting the pedals and steering column so I could get the seat centered. Once I had marked the center I adjusted the seat to the center of the front/rear adjustment range. After supporting the seat rails with some wood I sat down and moved it around till I was satisfied with my seating position. Now I marked the front mounting hole for reference and got the seat out of the way. I made a drilling template out of MDF board which I set level in relation to the body so I could measure the length of the bushings that support the seat rails. Simply using allthread with nuts and washers this is an easy task. Just bolting a seat down to the thin floor pan would not be safe, during a collission the bolts will just rip through the metal and even with normal use it would deform so I made reinforcement plates. I started with thick wall rectangle steel tube and cut it in half. This is way easier then trying to bend a small edge to a plate. To get a nice flat mounting area for the rails I cut thick metal strips to size. These strips were also ideal to weld the bushings to. Since I didn't have a decent welder and lack the skills I had my buddy TIG weld the brackets and reinforcement plates together. Only thing left to do here is heat and bend the reinforcement plates to follow the floor contour in some places.


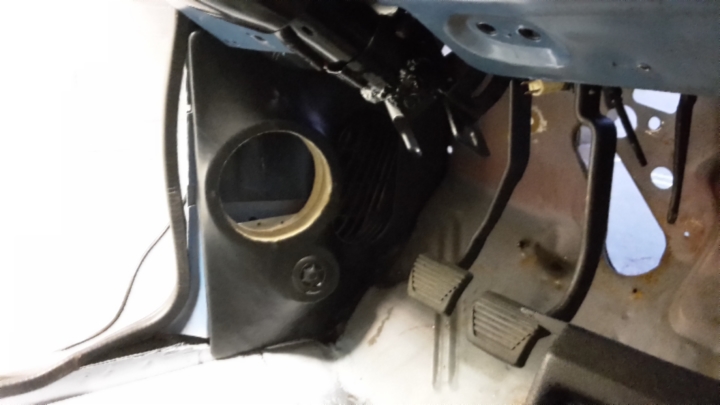
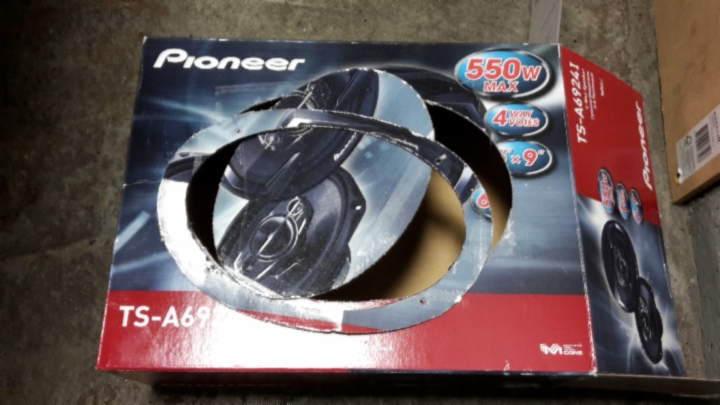
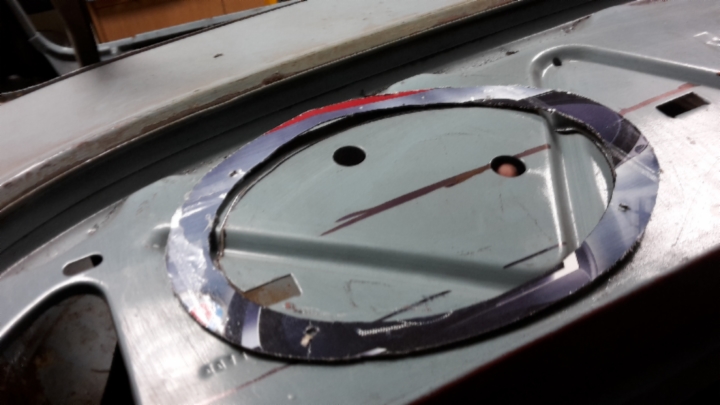
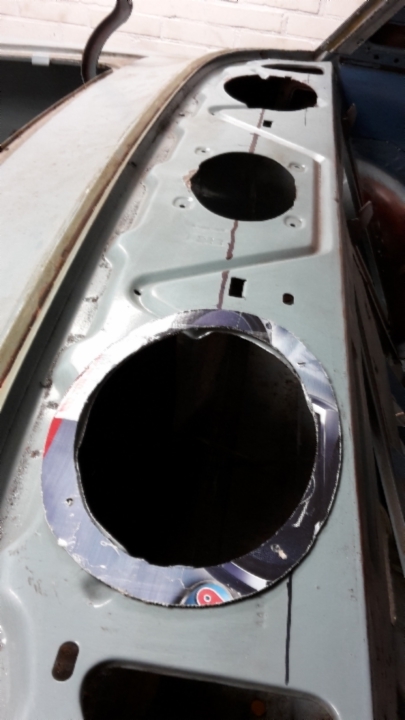
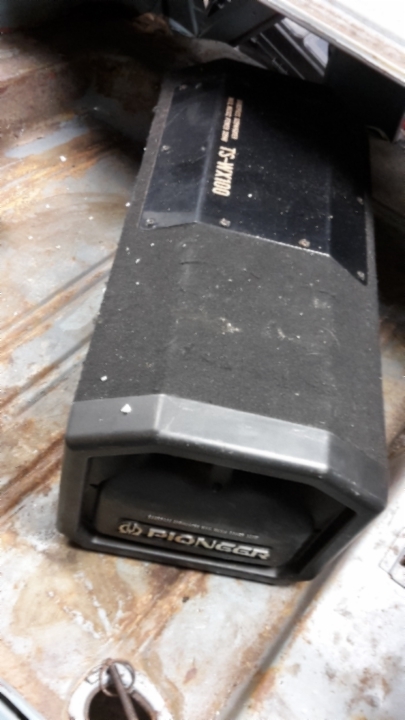
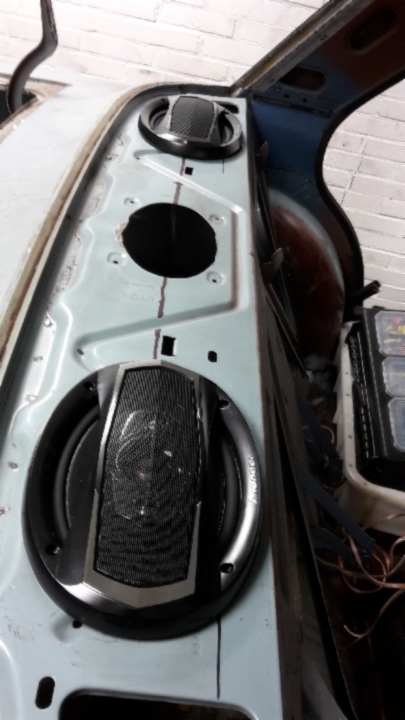
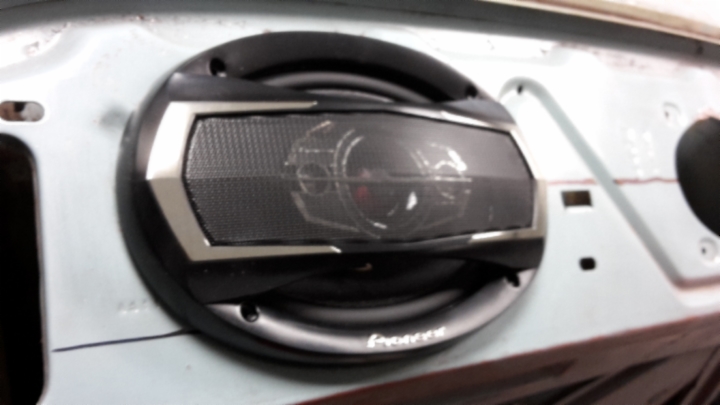
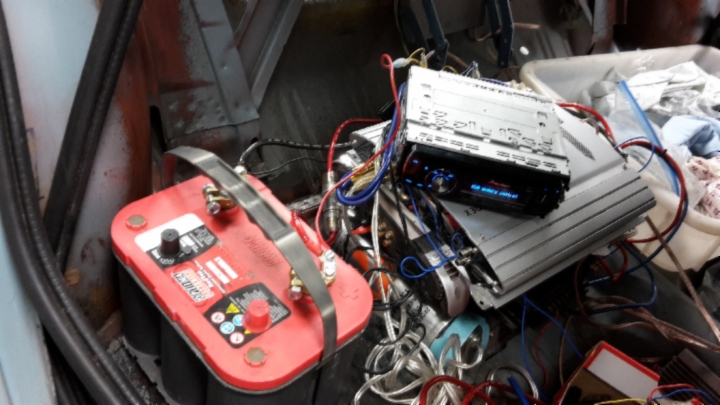
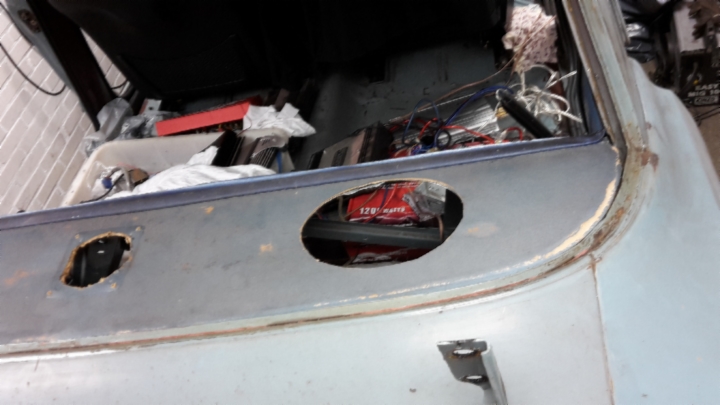
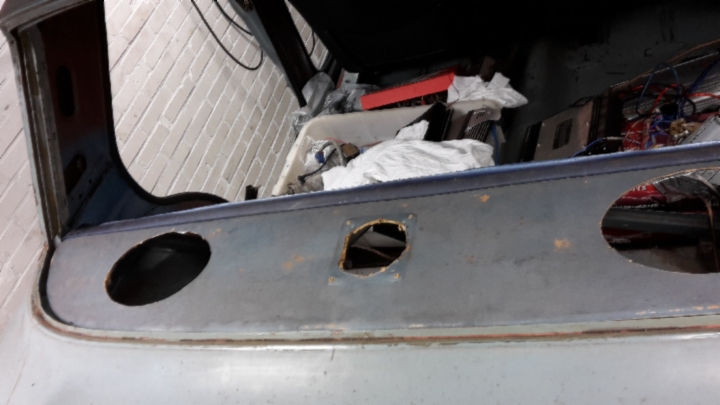
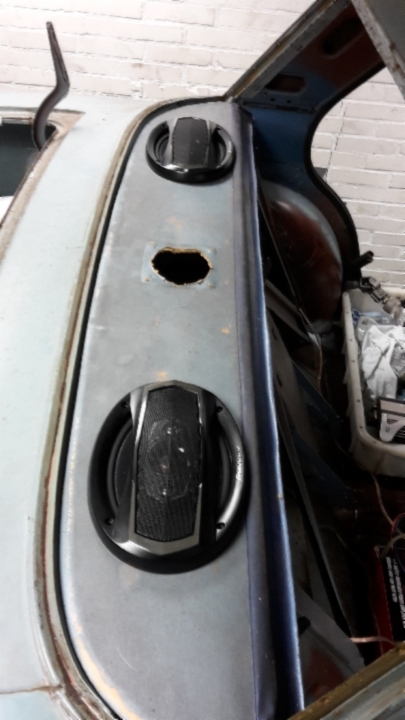
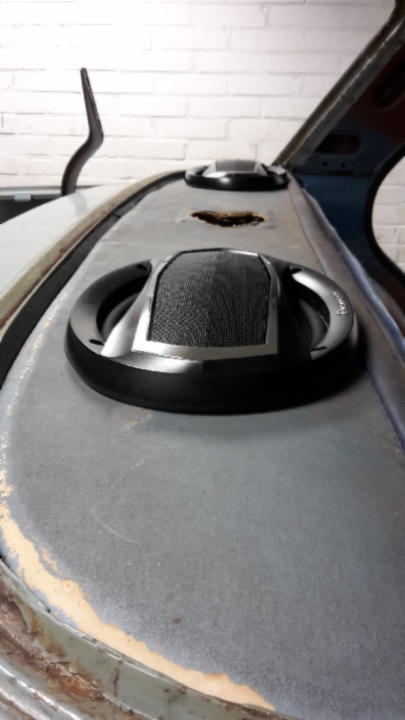
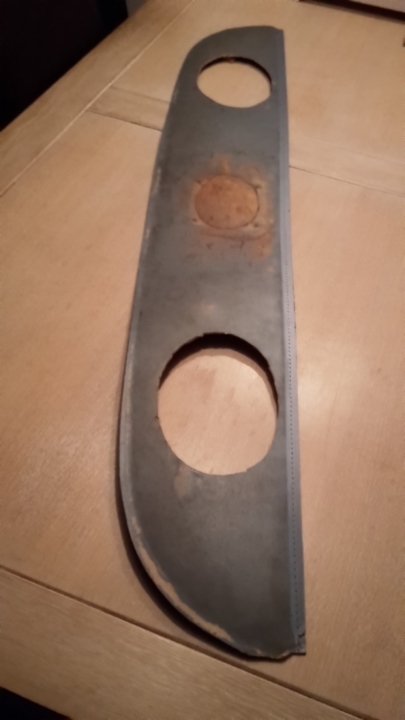
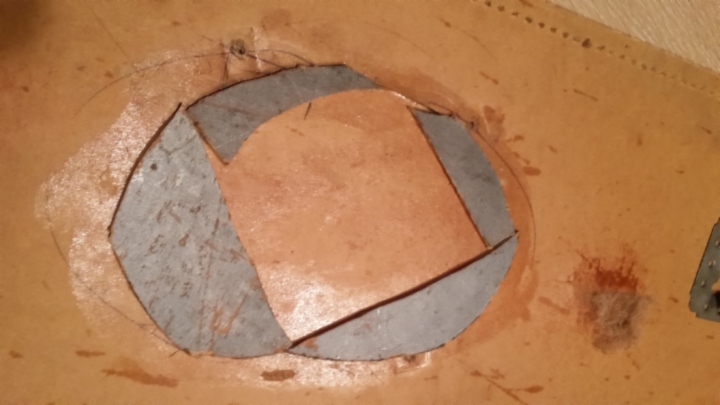
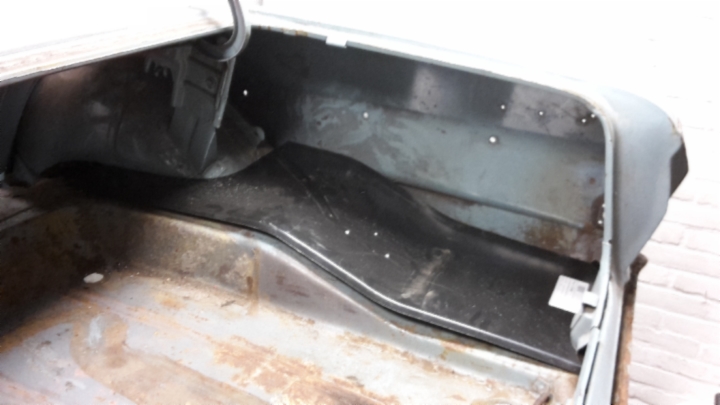
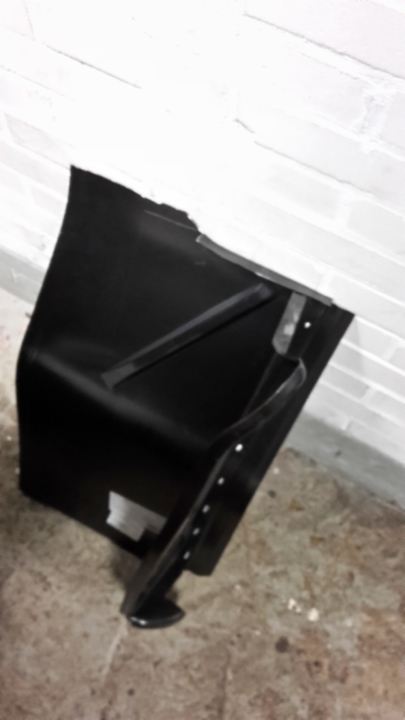
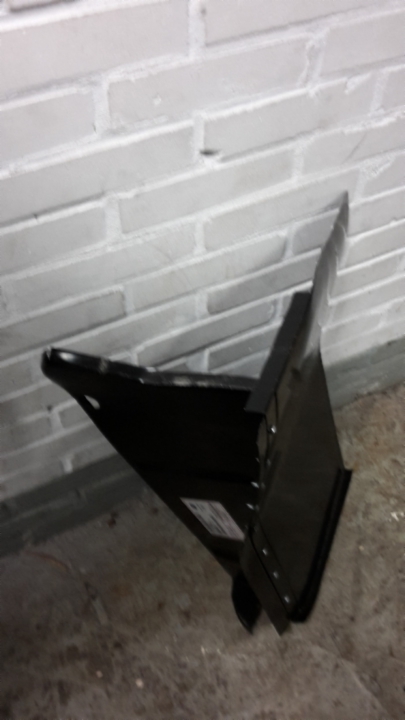
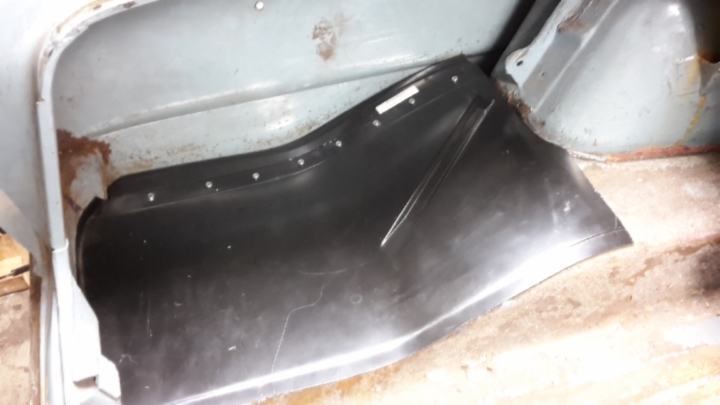
My friend Bram from Rookie Parts in Kampen brought me trunk floor repair panels and trunk drop offs from Classicindustries. I had a quick look and they appeared to be a good fit. During the Christmas holiday I always try to find a job to do to fill some spare hours. I had already made kick panels long time ago and I decided to do some stuff on the stereo install. The company I work for gave me a gift card for Christmas which I used towards some very nice 550 Watt Pioneer 6x9 oval speakers for the package tray. I still had some amplifiers and cables, even got some more amps from a friend and I found a nice second hand radio cheap. Together with my old bandpass subwoofer box this stuff will give me great audio. New speakers usually come with a cutting template which makes it easy to see how and where they will fit. After placing the template and measuring so left and right are in the same spot I cut the package tray. The speakers will be mounted on top so they will be visible like it was done in the old days. I tested the system just to see if everything worked....this is going to be sweet :-) The previous owner mounted a speaker in the center of the package tray which left a hole in the cardboard cover. With a piece cut out for the new speakers I closed the hole and once it is covered with some foam and black vinyl it won't be visible anymore.

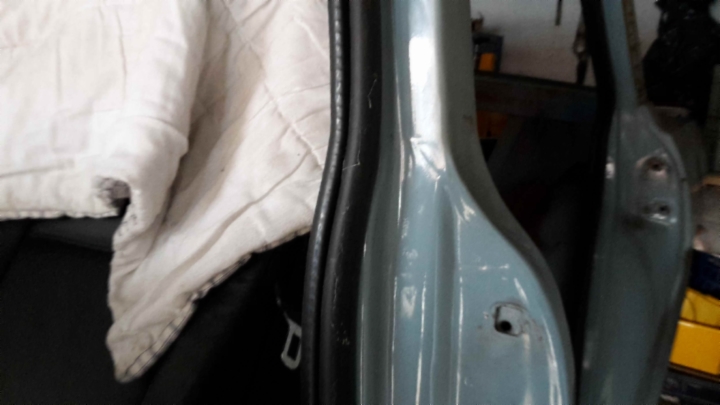
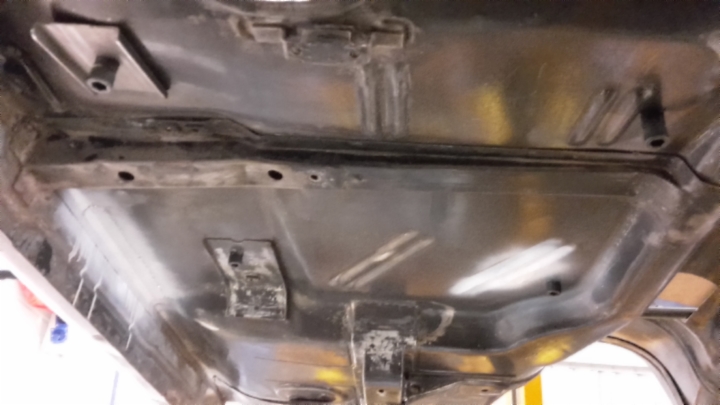
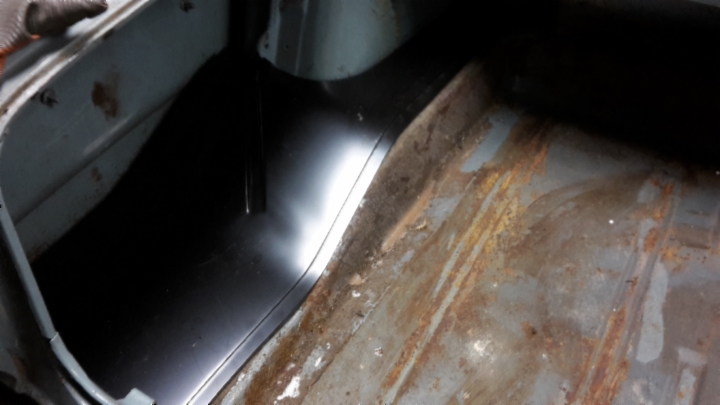
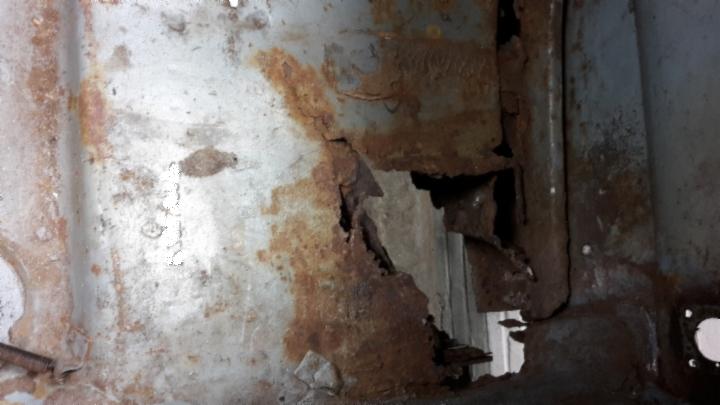
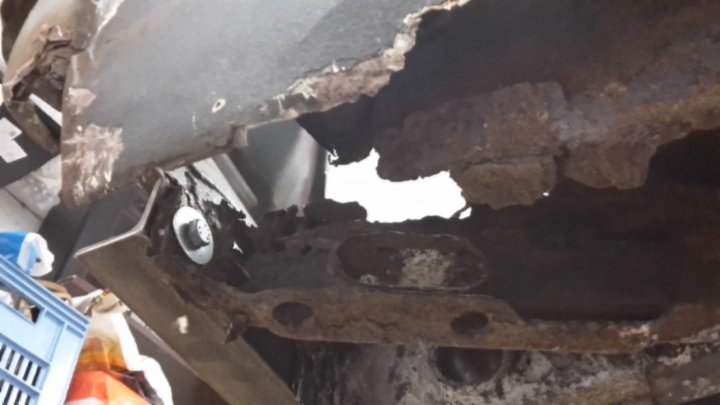
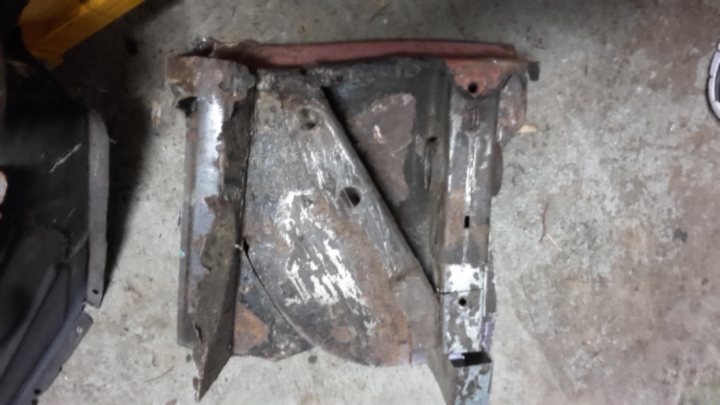
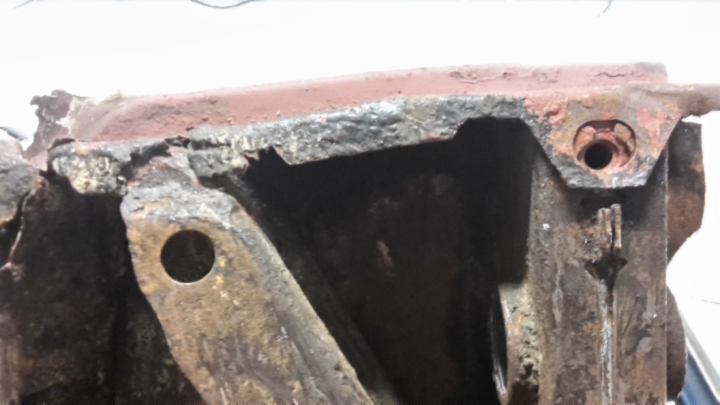
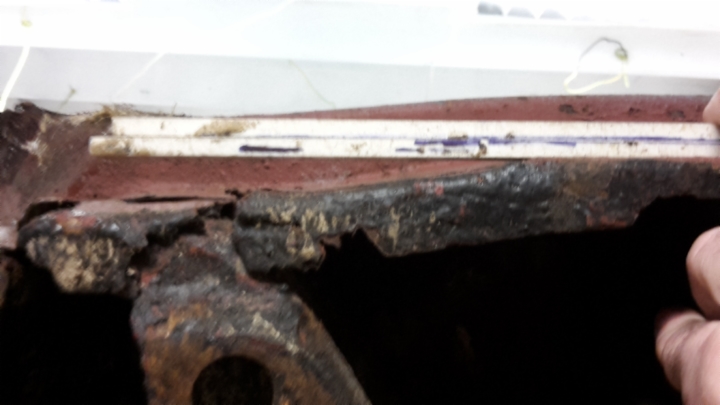
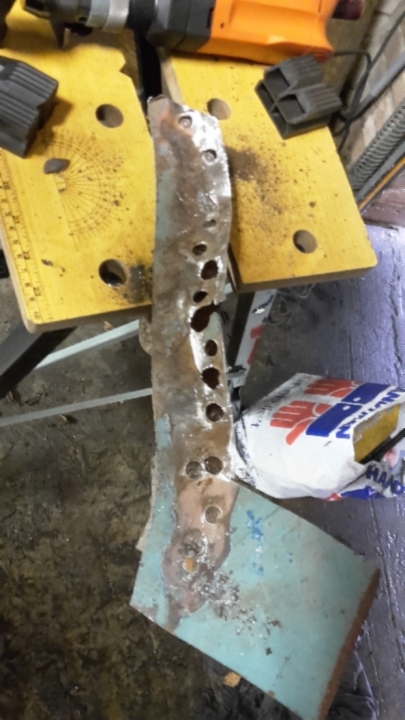
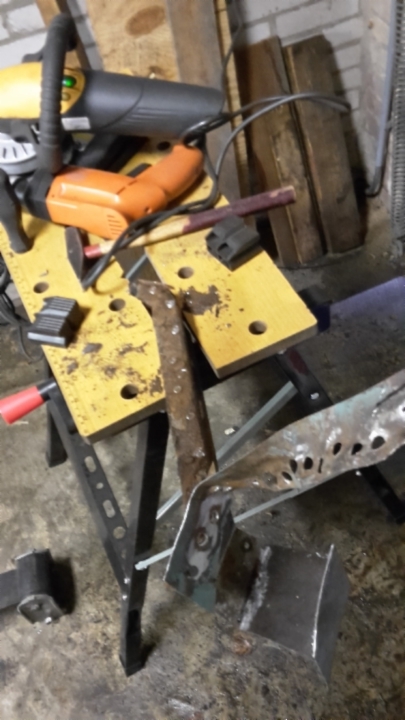
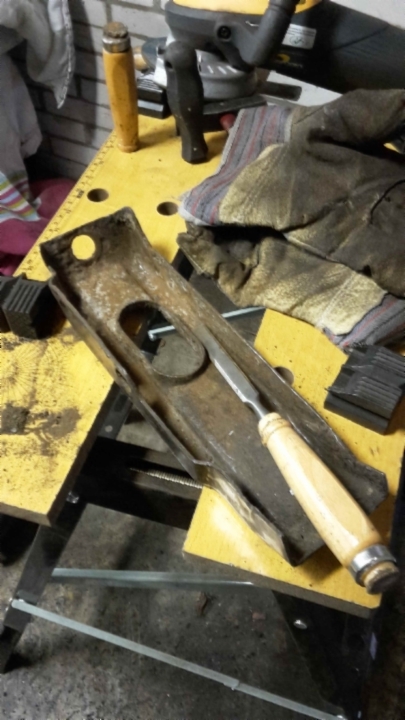
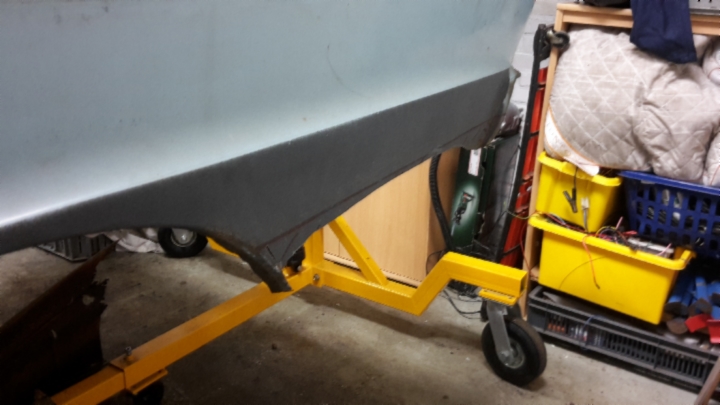
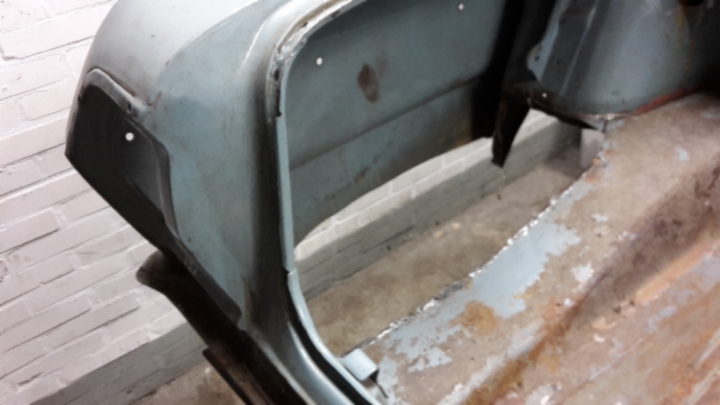
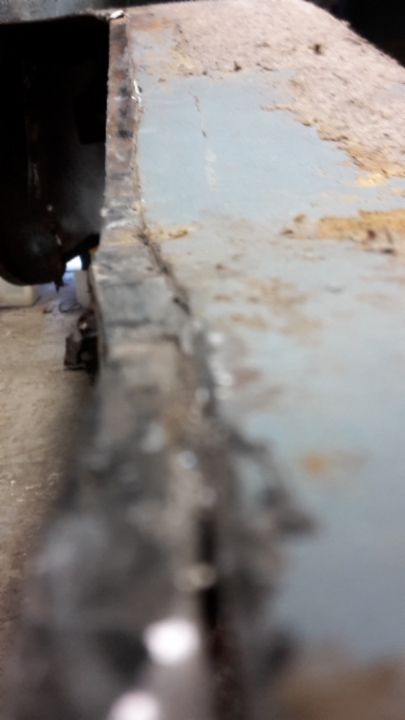
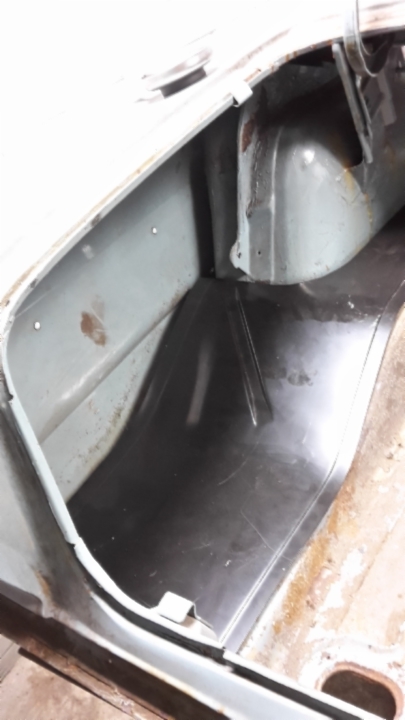
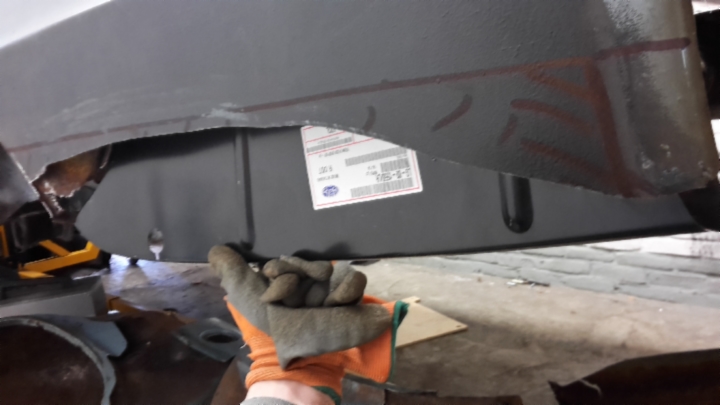
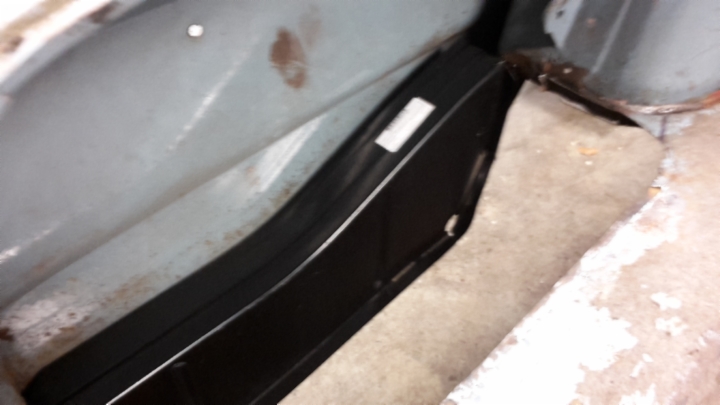
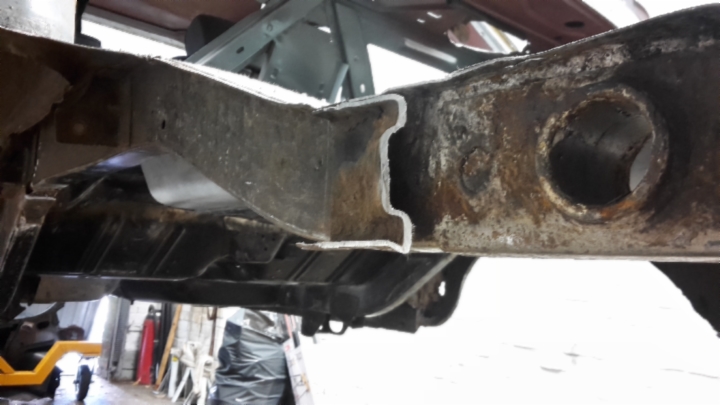
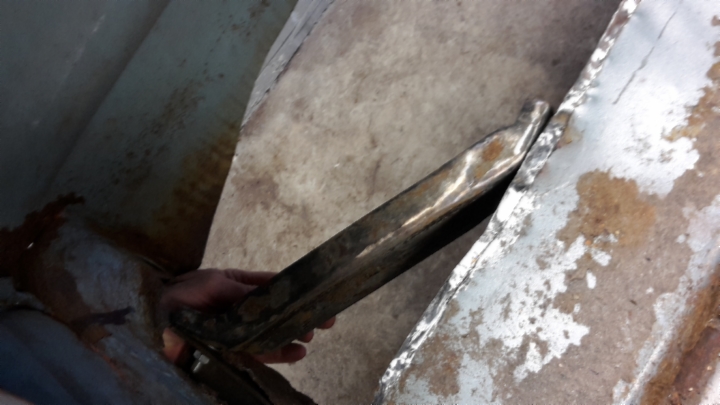
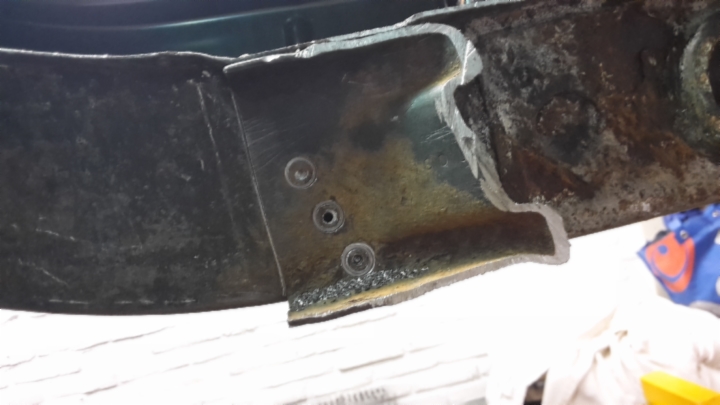
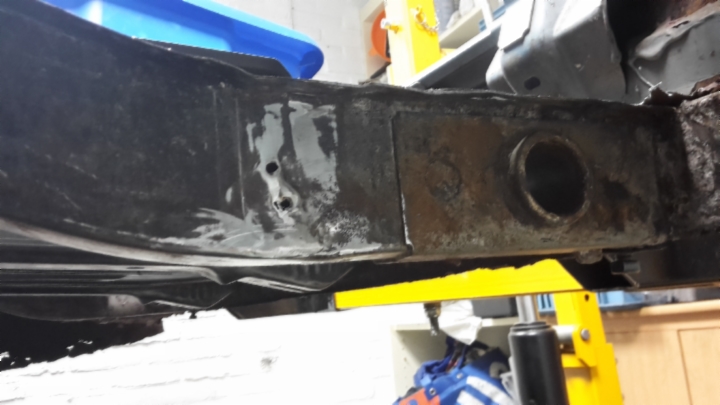
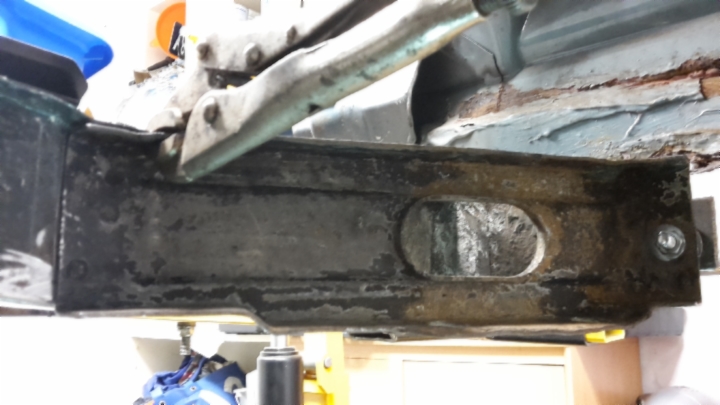
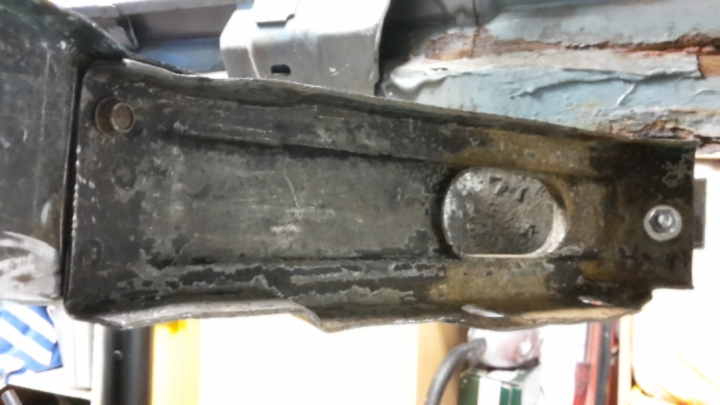
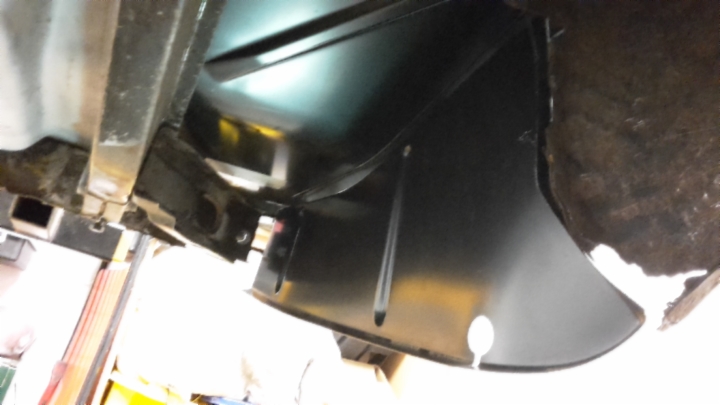
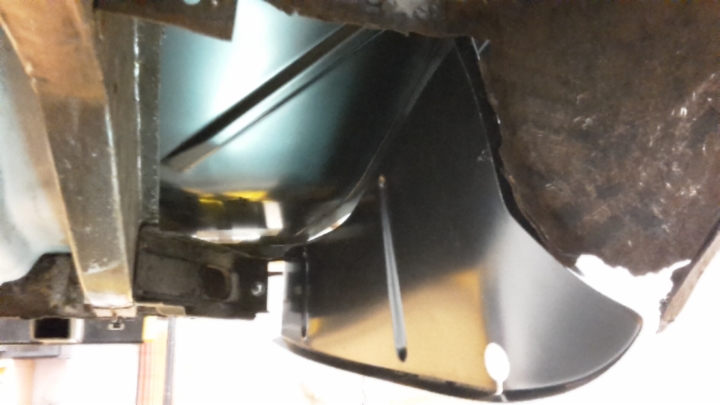
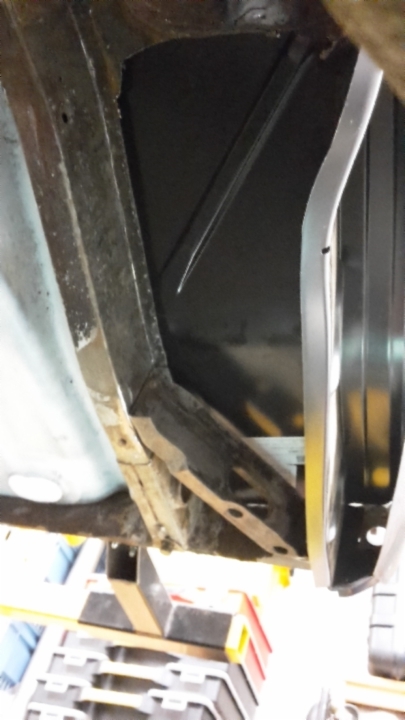
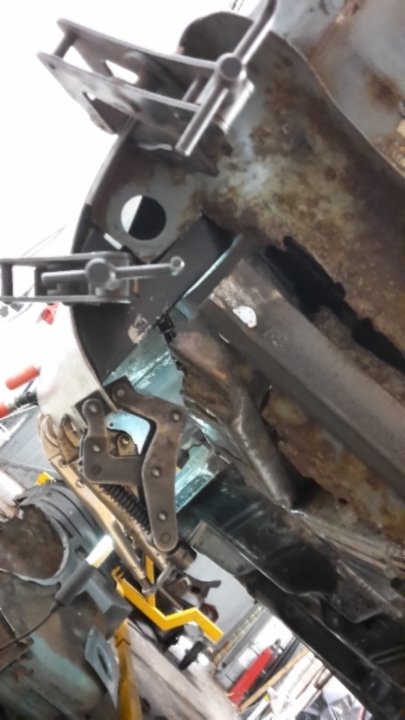
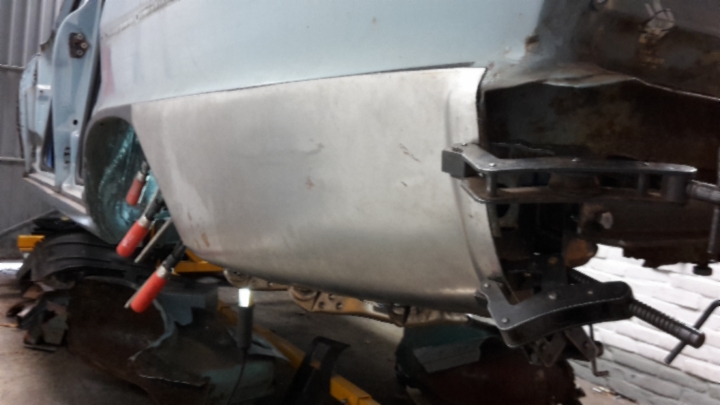
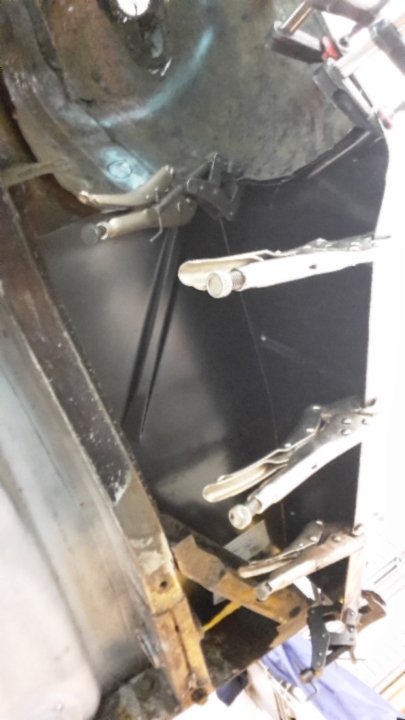
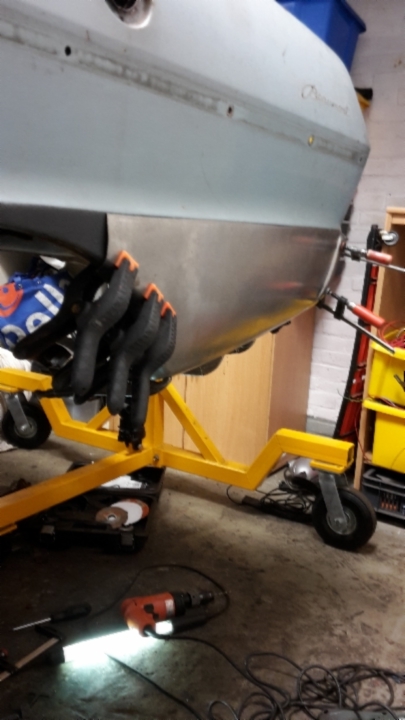
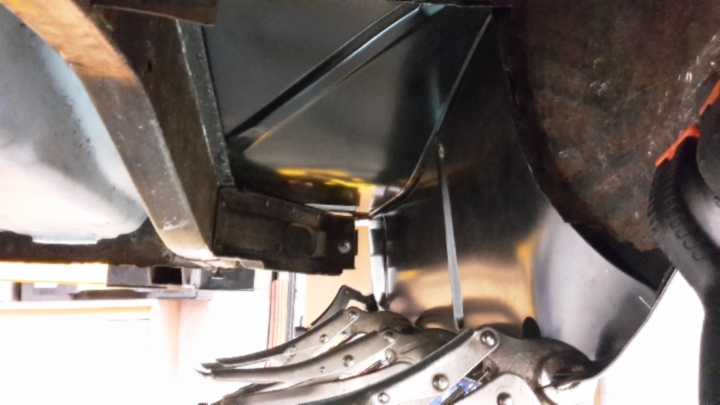
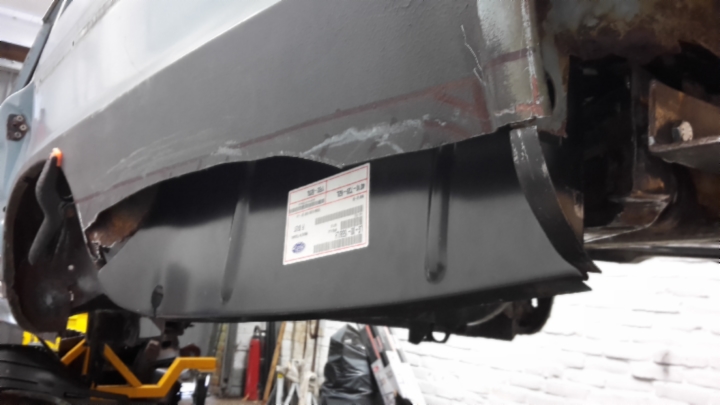
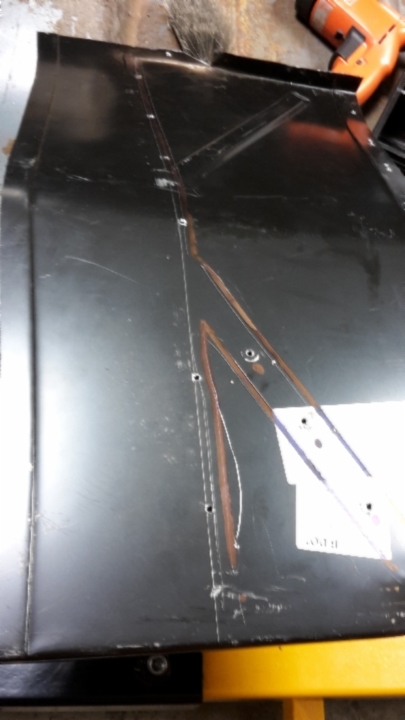
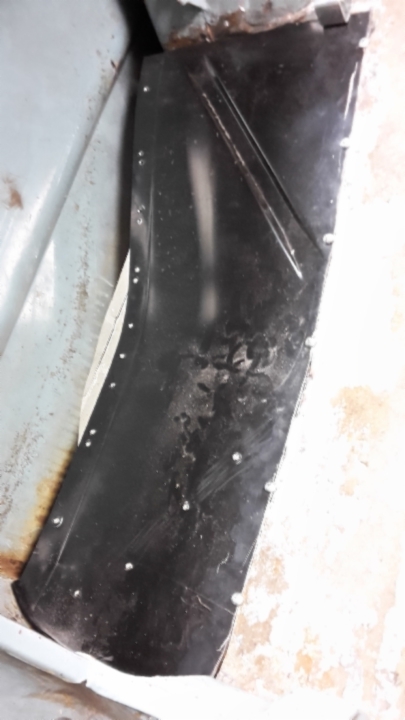
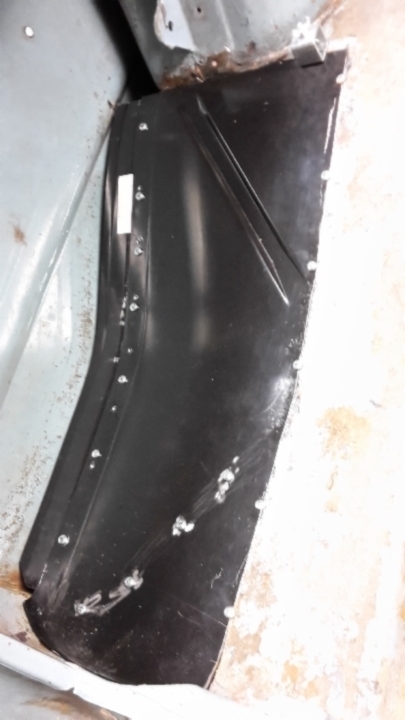
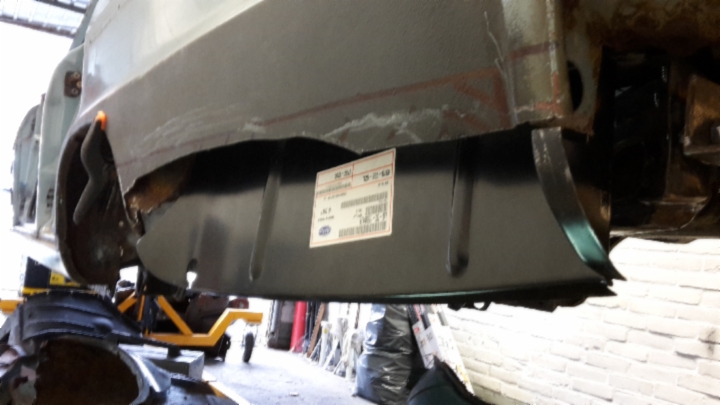
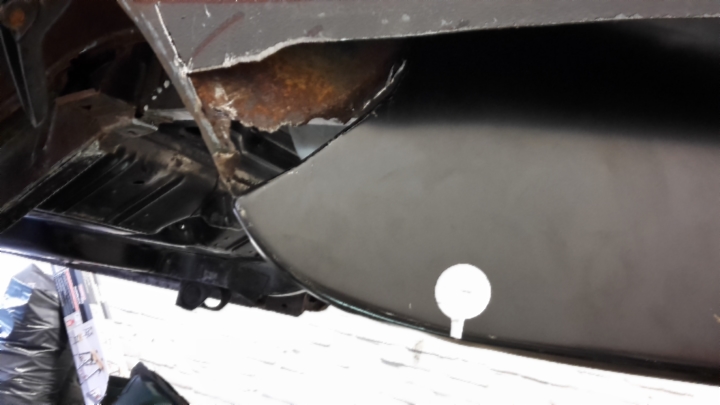
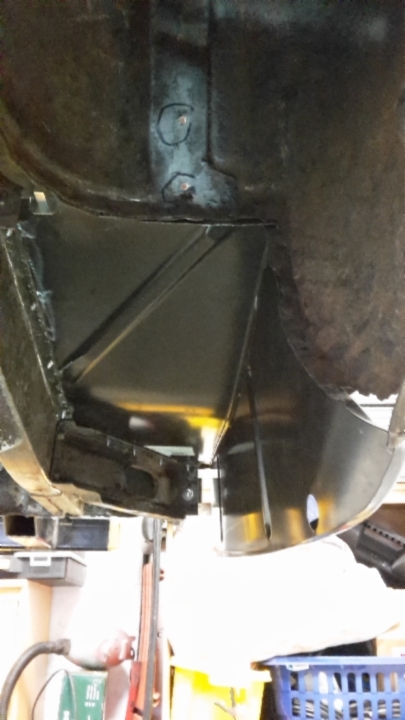
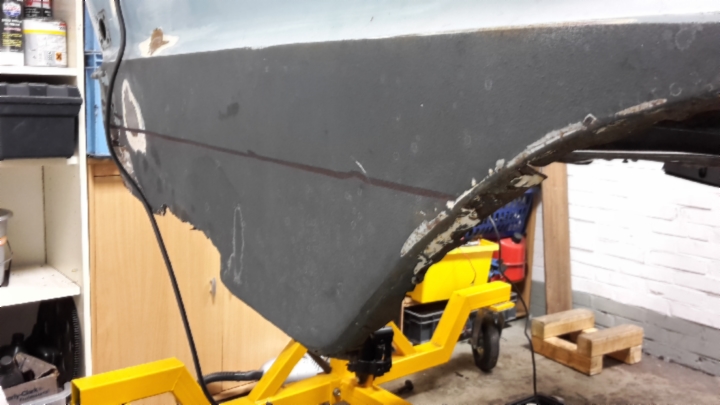
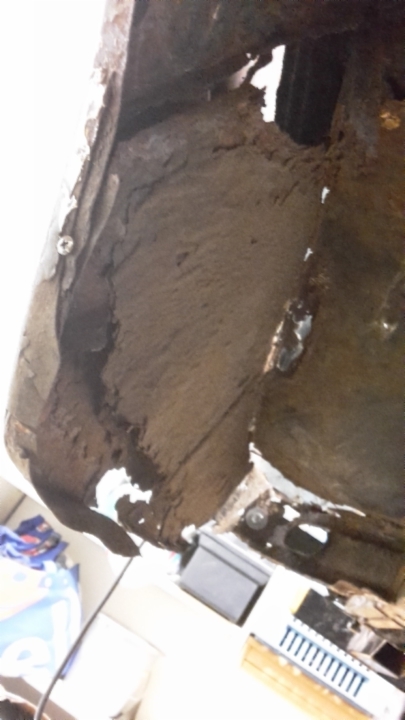
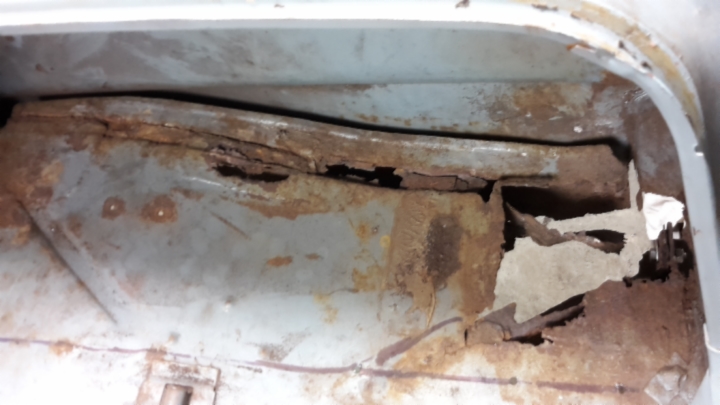
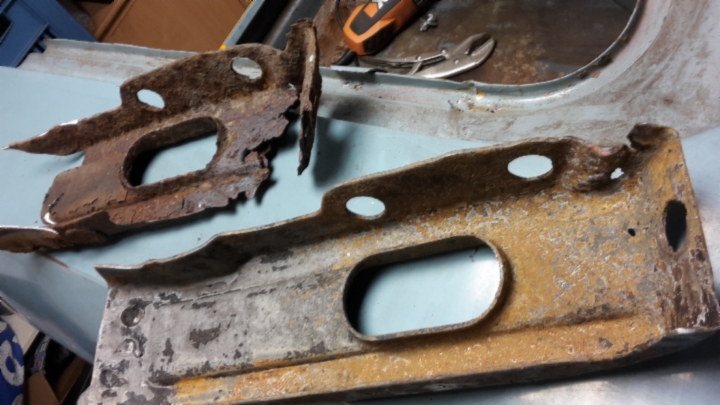
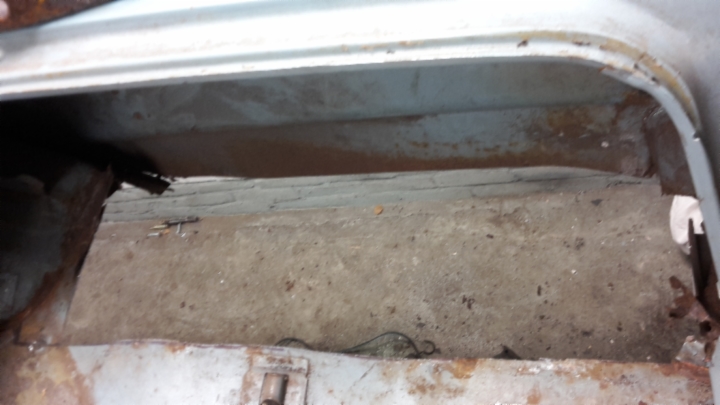
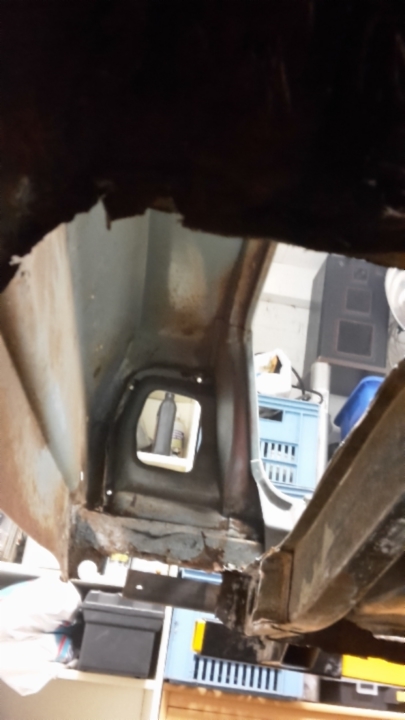
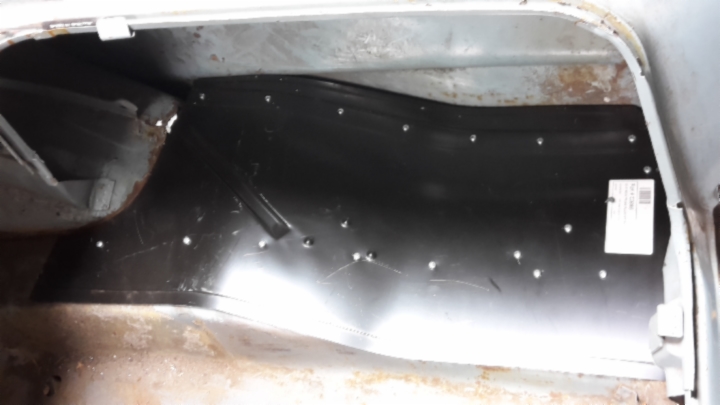
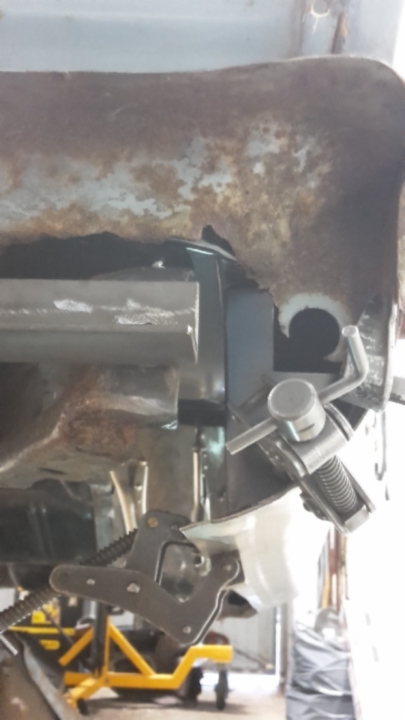
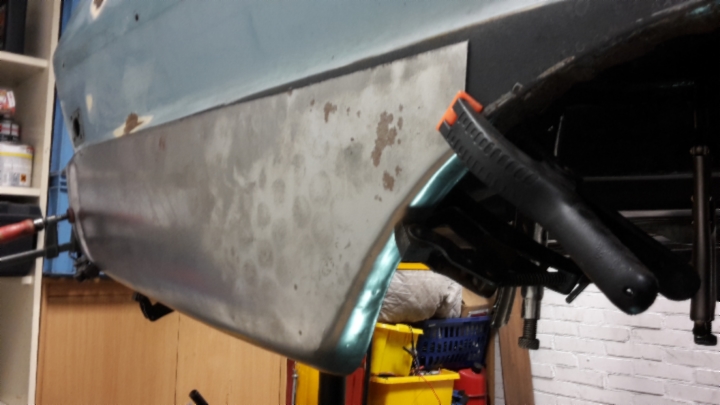
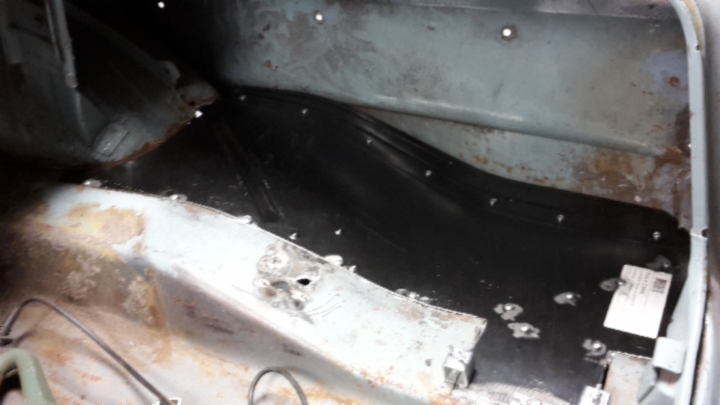
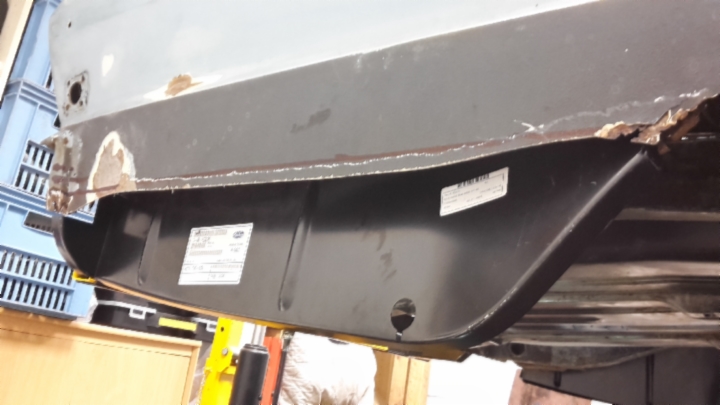
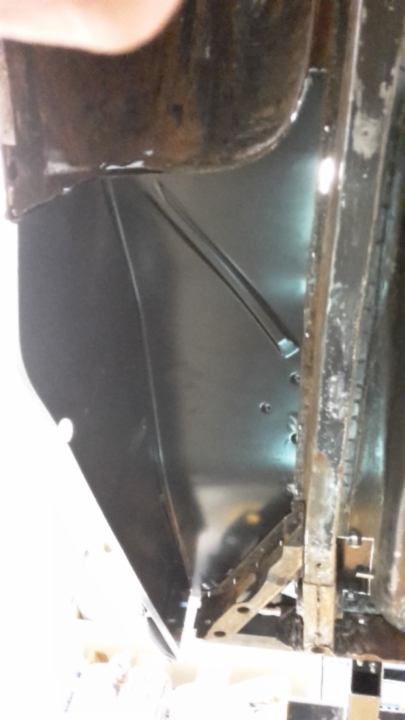
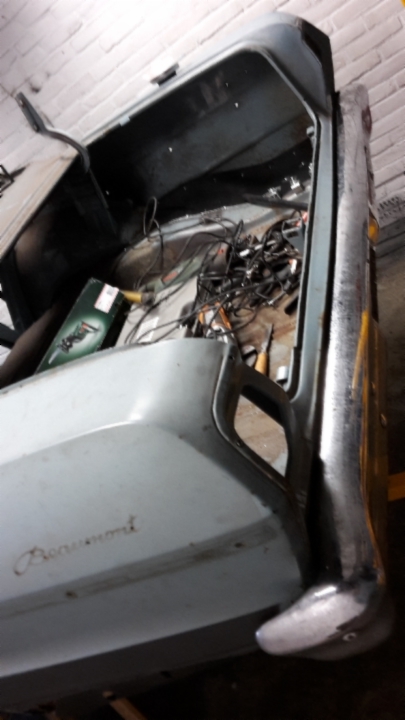
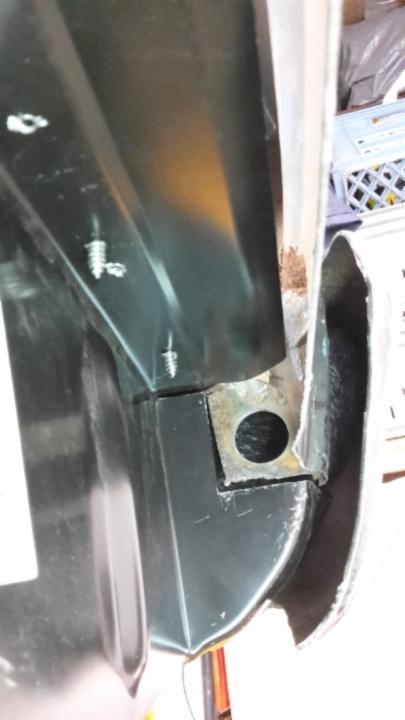
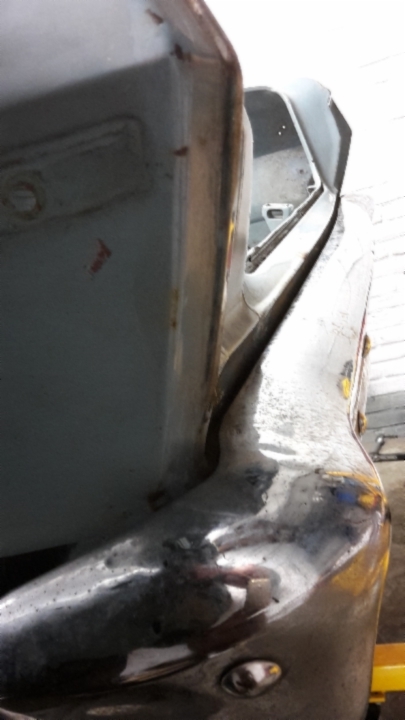
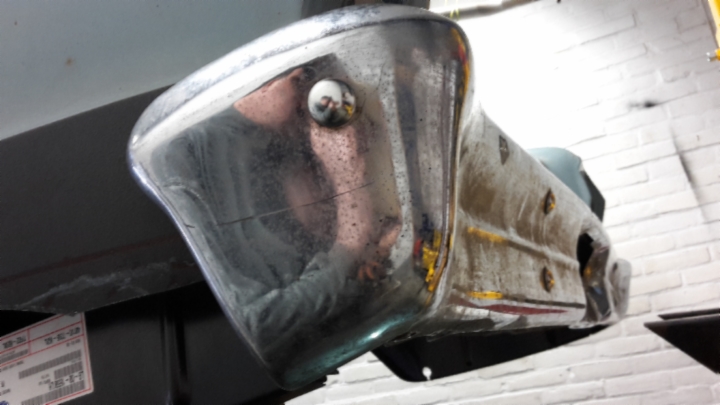
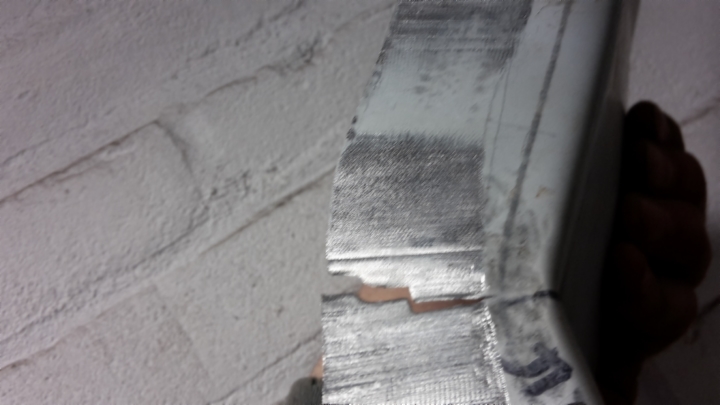
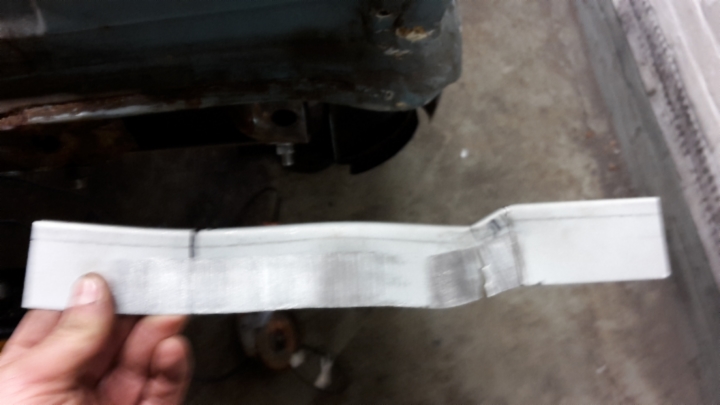
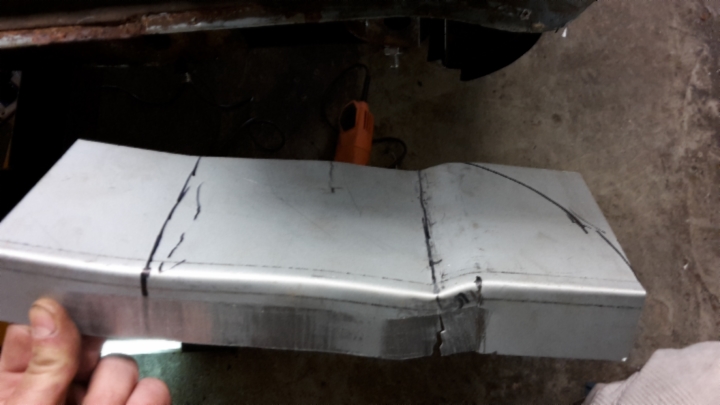
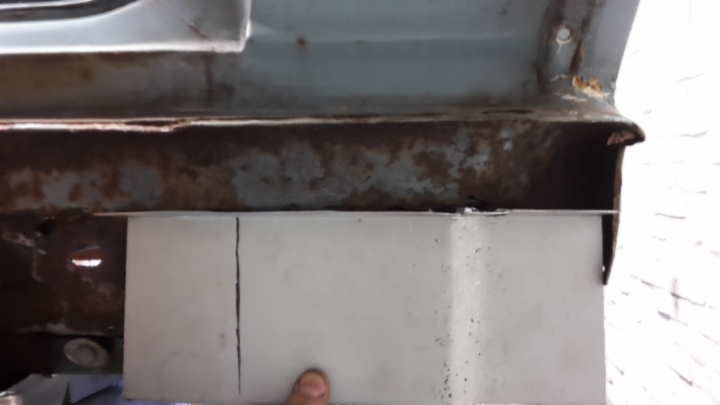
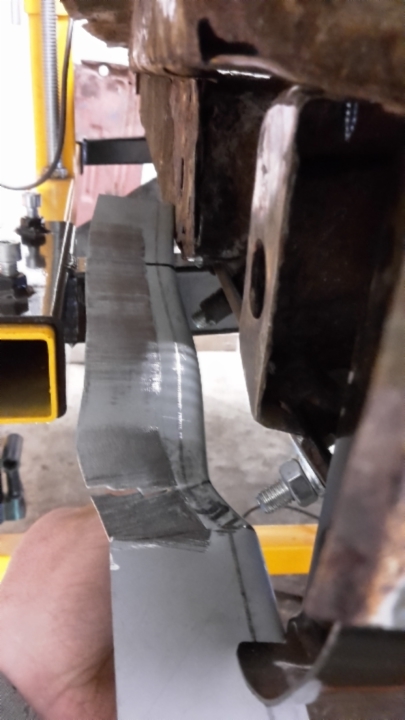
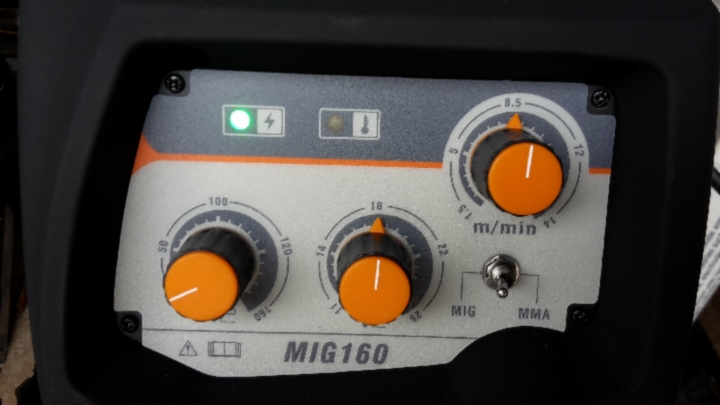
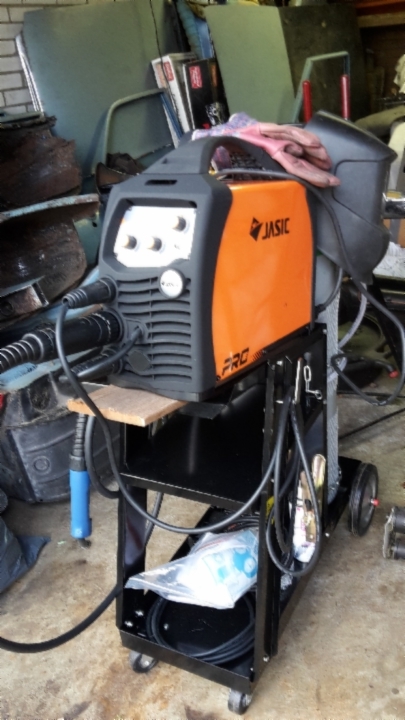
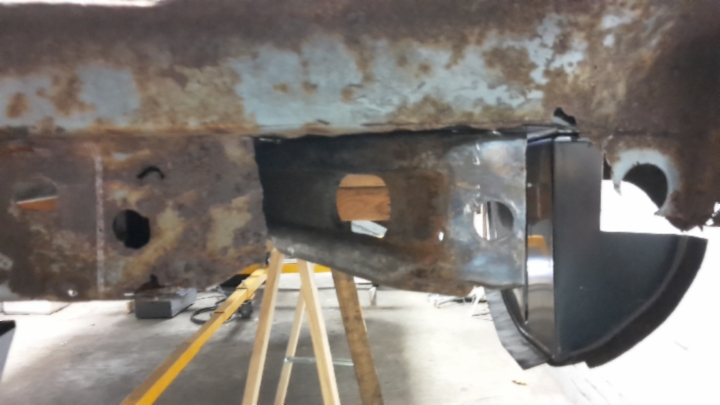
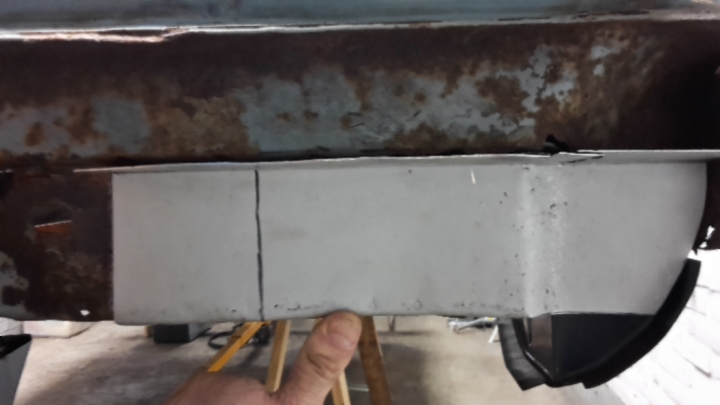
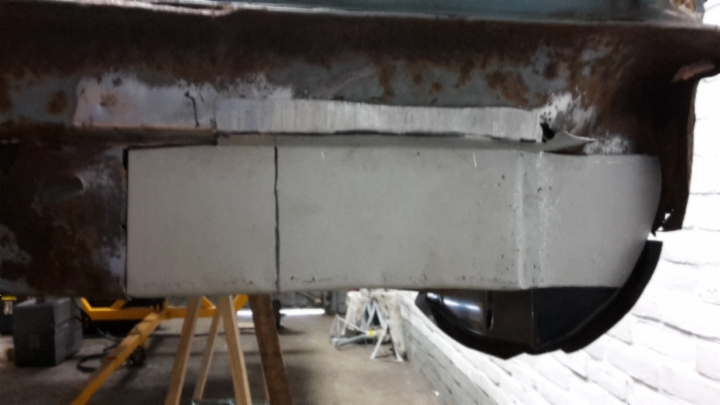
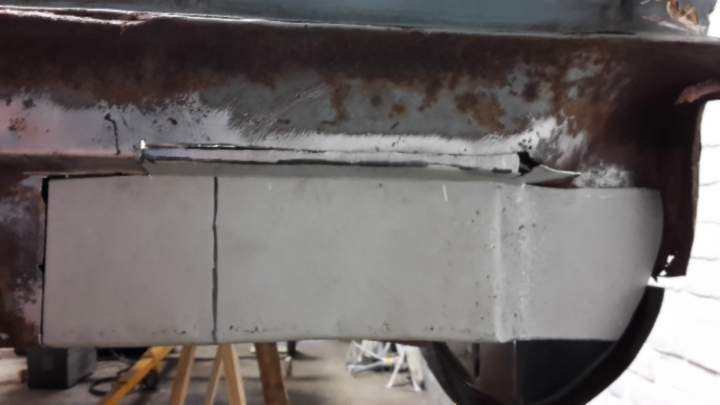
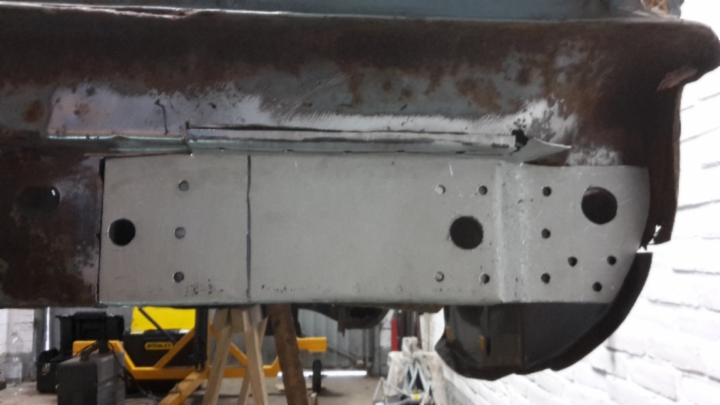
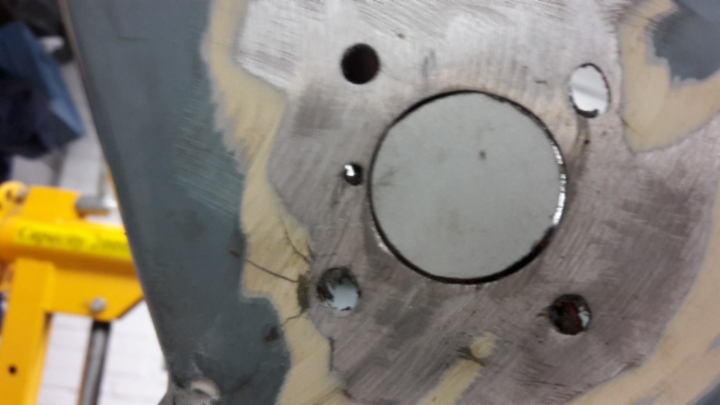
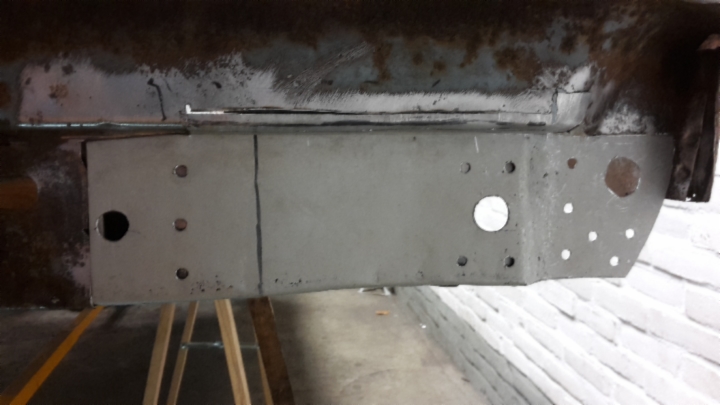
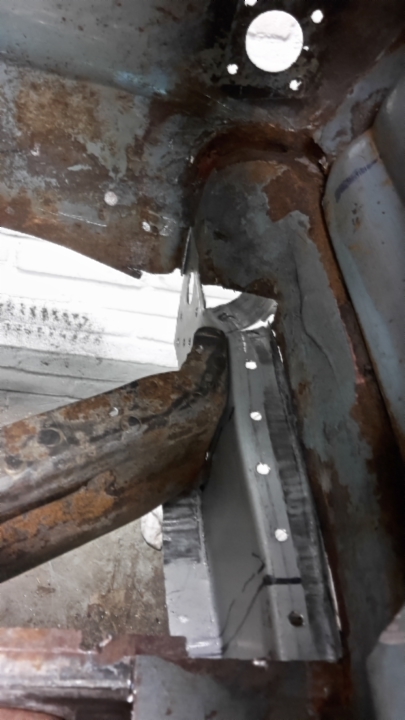
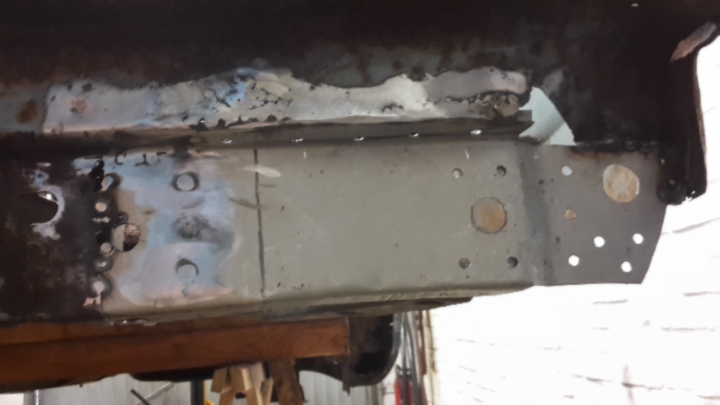
The time came to make sheet metal repairs. I talked to a body man who could do the repairs and he gave me a quote for the work. It's a lot of work which equals big chunks of money so we discussed stuff I could do to save money before I handed it over. The next slot was 7 weeks away so time left for me to get started and the thought of having a finished body soon got me motivated. With the repair panels in hand I started fitting, measuring and finally cuting away the bad rusted out parts. The bumper supports were really bad but the ones on the body I cut up and scrapped were good so I kept those. It was a lot of work cleaning up these brackets but everything I did myself would save me $$. I cut away the bad parts of the trunk floor and saw the frame rails were in good condition so this was going to be the ideal place to mate the repair panels to the original floor. Once everything fitted I used sheet metal screws to hold it all together. Even now it already felt very solid so when I was finished on both sides I test fitted the bumper to be 100% sure everything would line up. As you can see in the pics it looks good. I was getting second thoughts about sourcing out the work since the work sofar actually went pretty good and financially I wasn't comfortable to spend the large amount to have the work done. Sure it would be finished in just 2 weeks and I could start with the rebuild but I had so many doubts and I know I would be broke afterwards. I would need to buy myself a good MIG welder but that would be cheaper than outsourcing the work plus after the job I would still have it plus the skills to use it. So.....I bit the bullet, bought me a very nice MIG/MMA inverter welder to continue the work myself. It will take a lot longer but will leave me with extra tools, skills and more satisfaction in the end. I already have a lot of sheet metal forming tools so I started putting them to good use and made a repair panel for the area behind the rear bumper. This will also be attached to the trunk floor and drop off so it makes sense to continue there, fixing that first and slowly work my way forward. I still need to learn a lot but what a difference it makes to have good tools! The welds I can make with this machine are clean (specially compared to my old flux core wire welder), it's very powerful and has so much adjustability. The first piece is welded in place and it is in solid. I still need to clean up some parts and fill in some pinholes but that will be easy. All the small holes in the patch panel are for plug welding, I tried to make it look as close to original as possible.


 <
<
The coming time it will be cutting, forming, welding, grinding...repeat. Loads of repairs to be made, it will probably take months to complete so it will be some time before the next update.
You can reach me by e-mail at: pro-touring @ hotmail .com